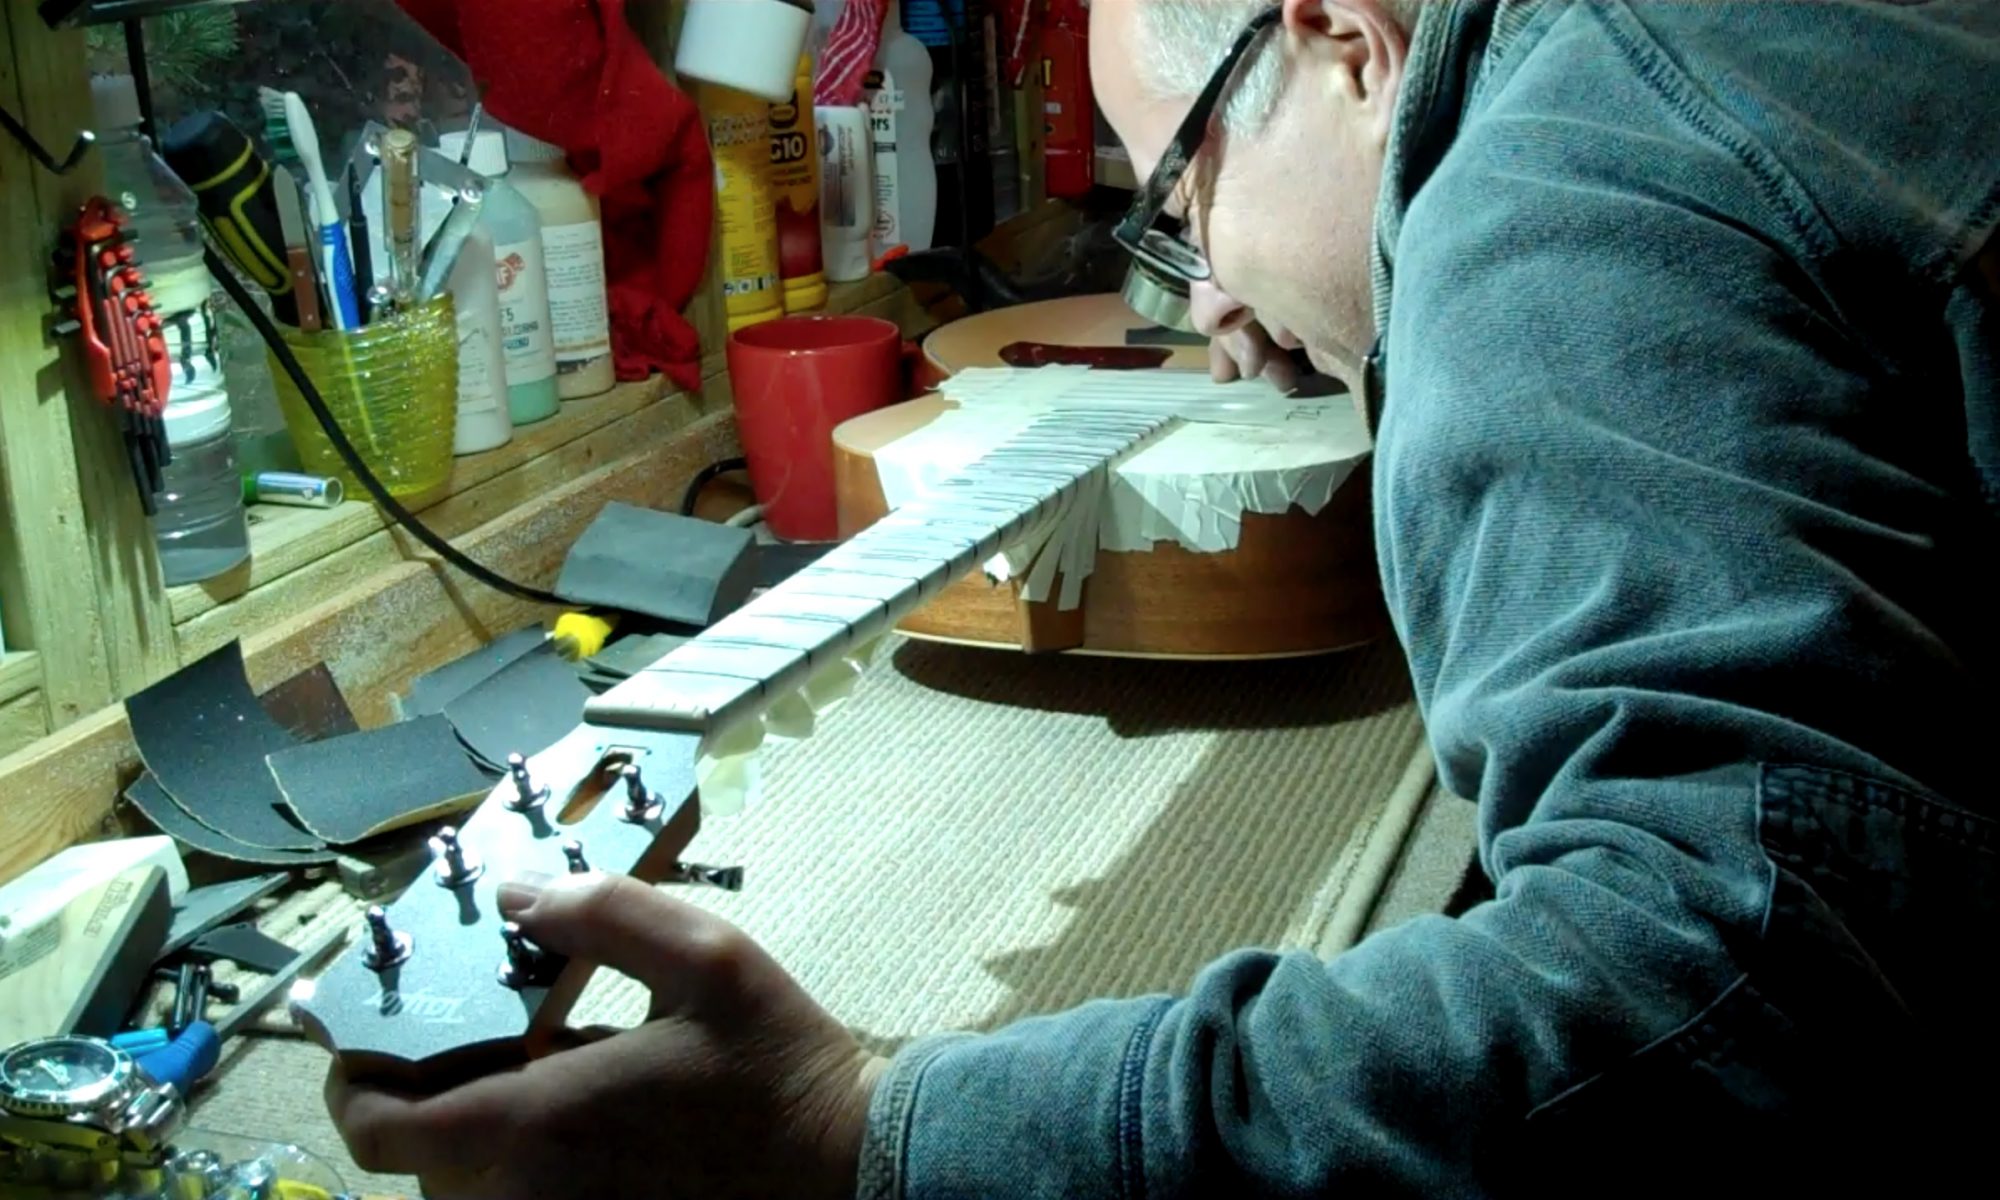
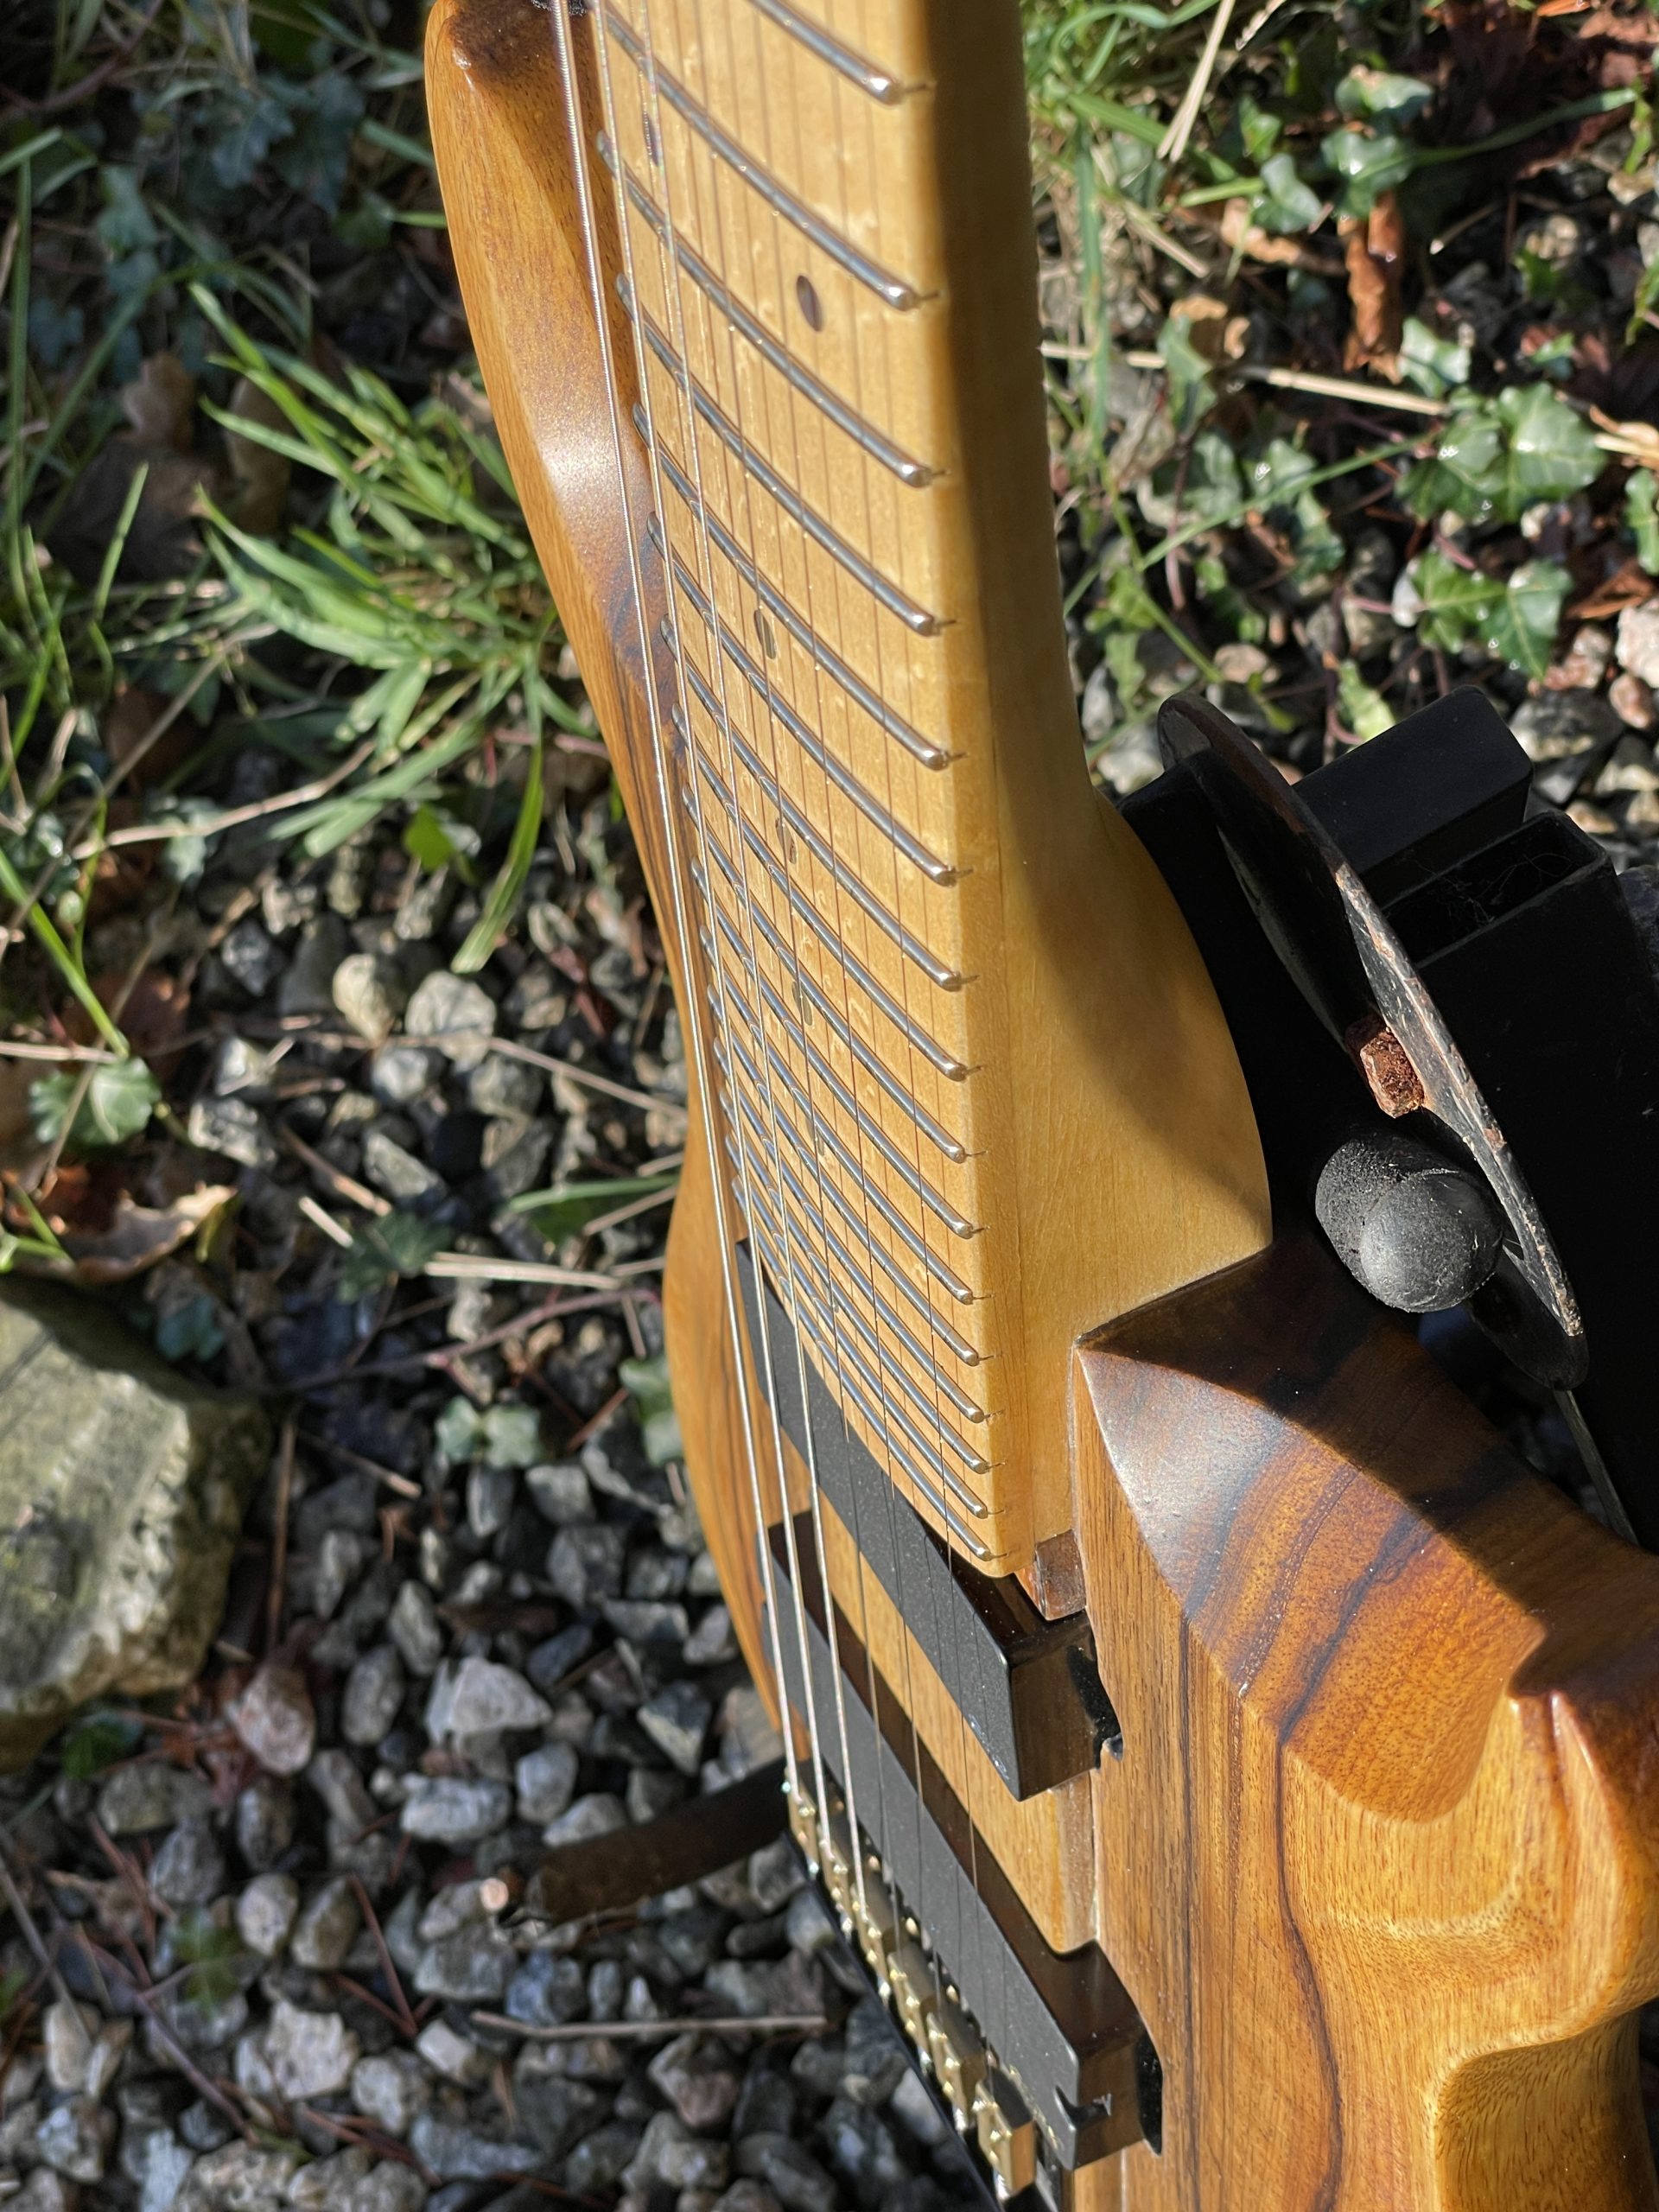
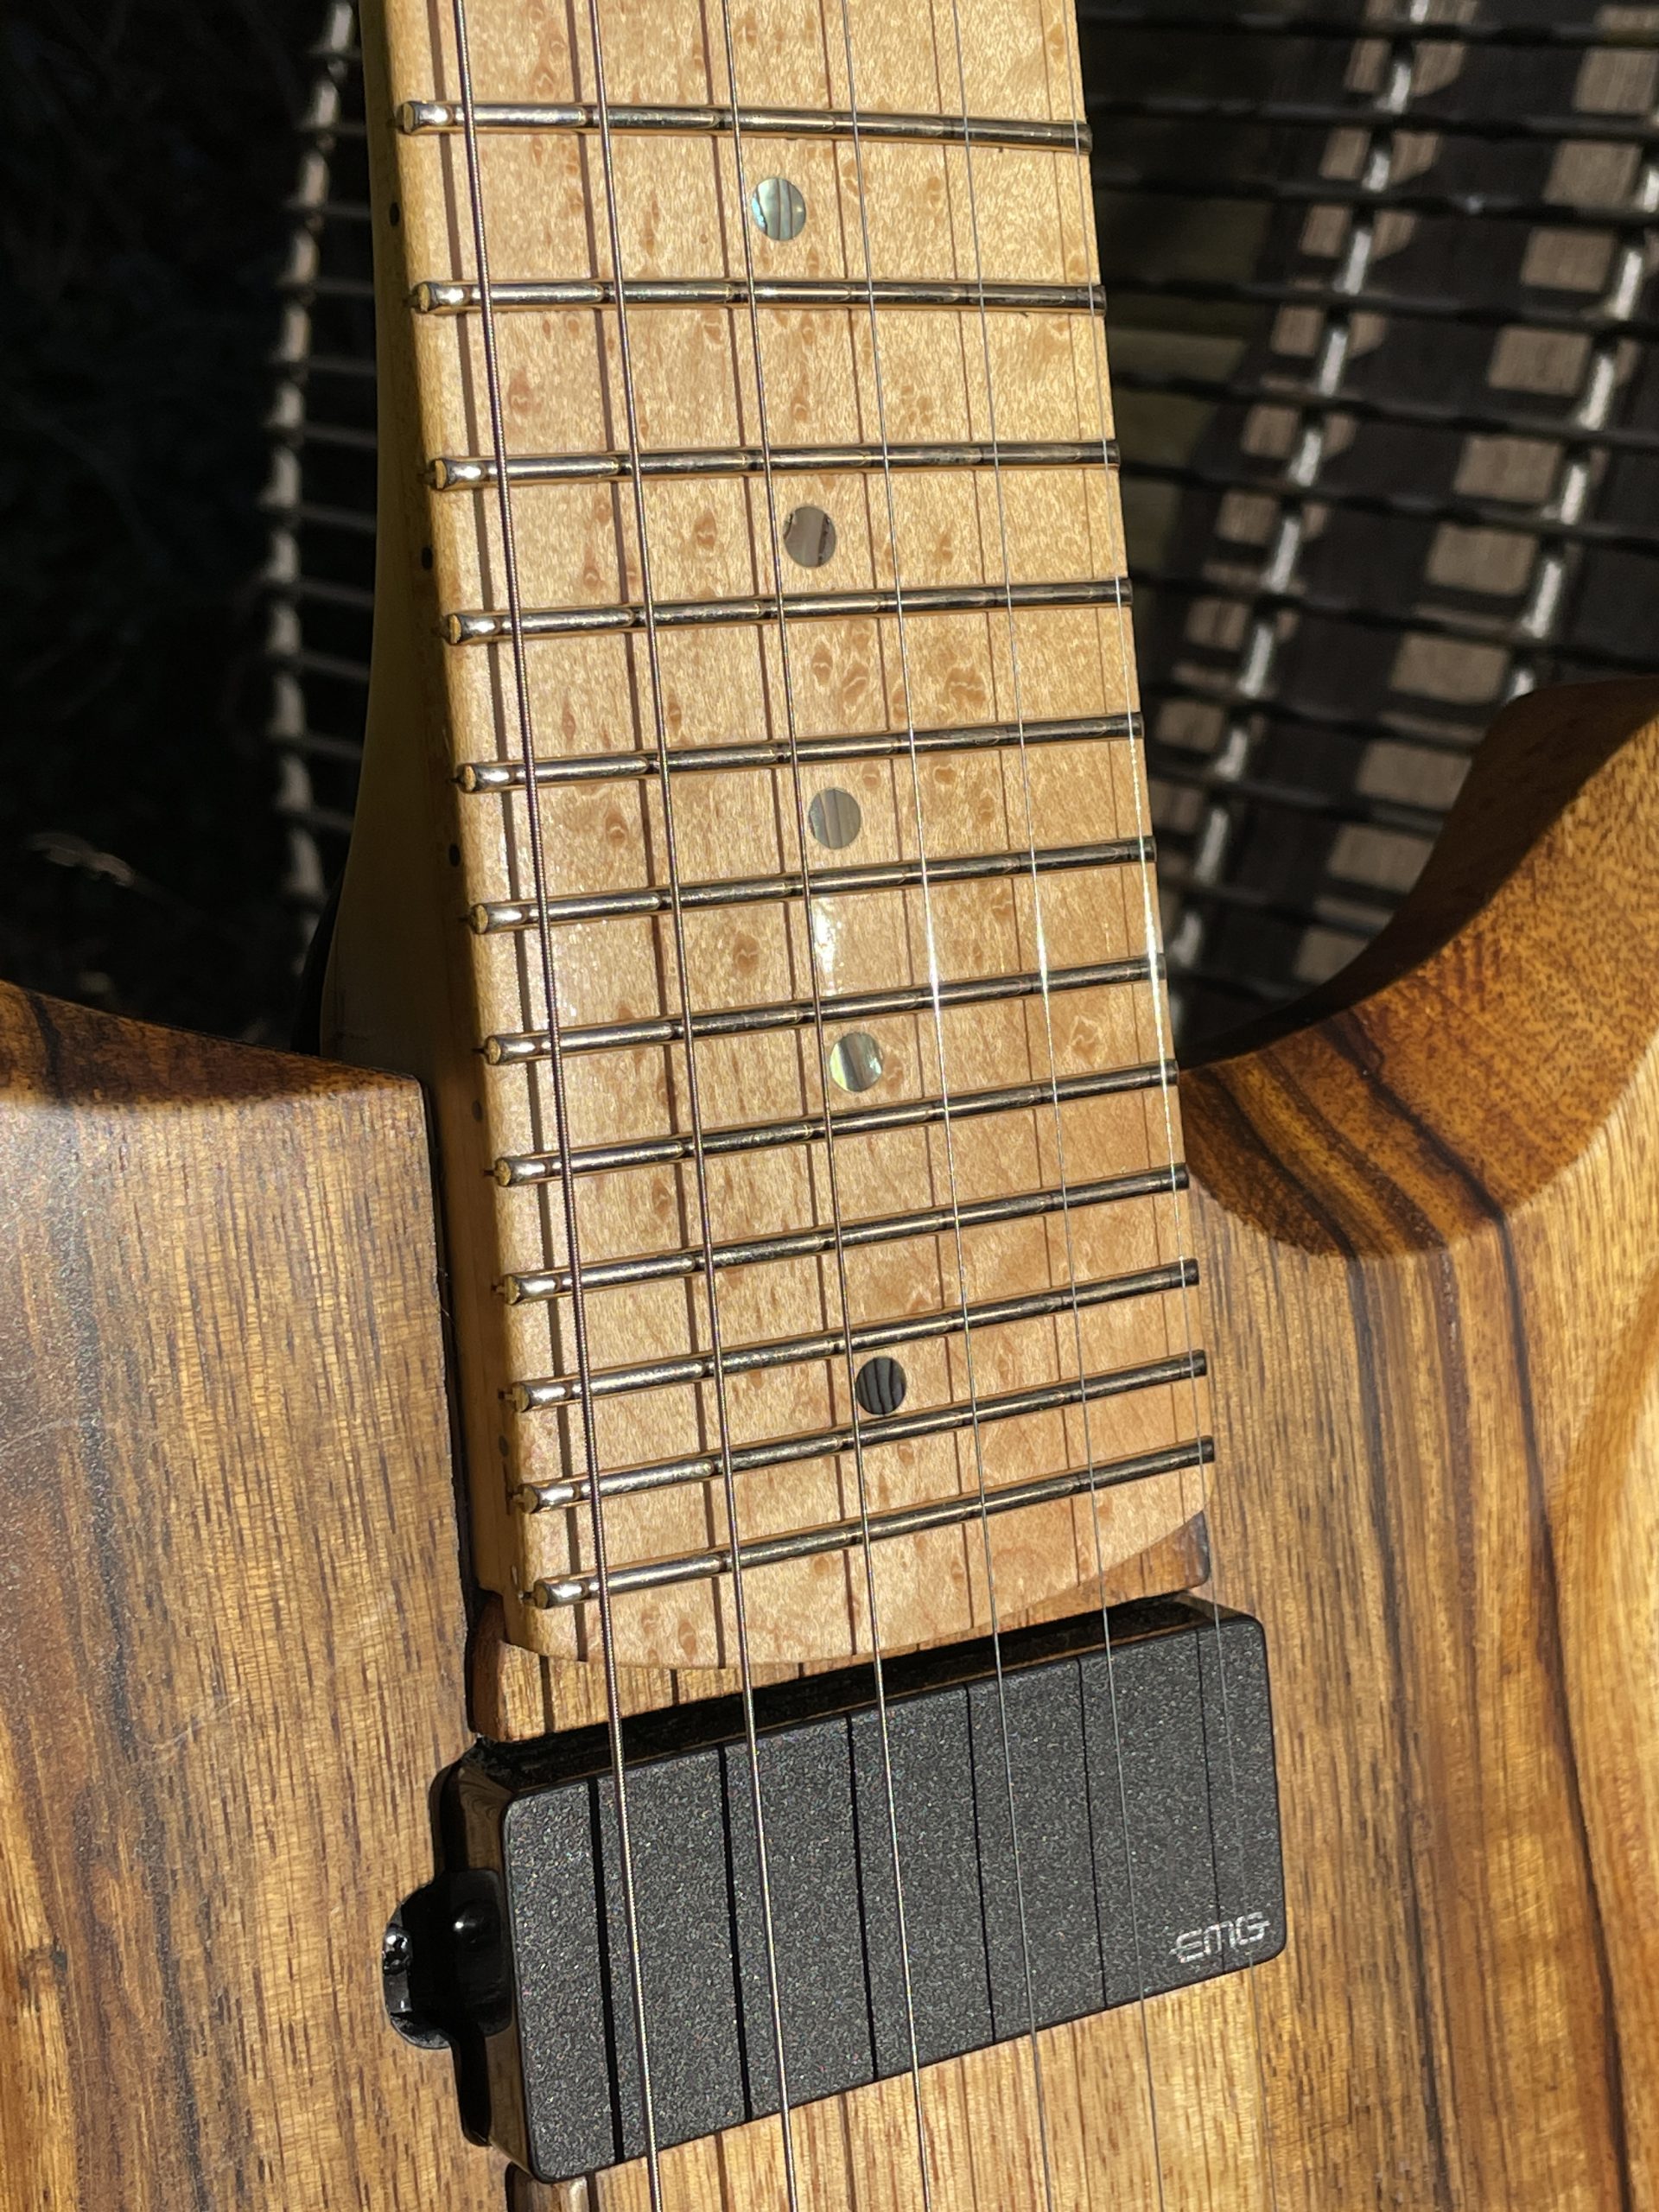
About a year and a half ago a customer of mine (who I had already made a 7-to-wide6-string conversion for) came back and asked if I could make an even wider necked guitar for him. I said “Yes… ” wondering what I was letting myself in for. I was fairly new to making my own necks from scratch; but this 25 fret, 60mm e-to-e at the nut neck was definitely going to be custom-made so I had no choice 🙂 I went quite a way to finding out what spacing my customer needed. The previous 48mm e-to-e spacing wasn’t enough, so I build a dummy section of neck (using a brand new bass neck, pulling the frets and re-fretting it like the first 3 frets of a very wide 6 string guitar!) and created pairs of nuts & saddles so that he could try out spacings of strings in 2mm increments. I fitted headless tuners and a locking brass block at the other end. (You can see the progress of this amazing build here: Ultra-ultra wide 6 string custom. My customer settled on 60mm e-to-e at the nut. To double check I mocked up the actual guitar dimensions that this would result in and made a double-thickness template and sent it to him in a cardboard box 😀 He responded that this was perfect for him. So I carried on. I had ordered two EMG 9 string active pickups; one was available and I placed an order with EMG for the other. A year later they STILL hadn’t built it so I went to plan C (plan B had been to use two regular humbuckers together in a ‘Z’) which was to use an 8-string EMG which I discovered just about covered the string spread near the 25th fret. And just the other day I finished it. What a monster – and amazingly, I enjoyed the challenge of playing it.
When I began using the ‘Banana’ fret levelling method about 6 years ago I was very confident about it’s power to precision level frets with the strings on under normal playing tension. In case you’ve never heard of this method before it’s very simple and elegant: you set up your guitar the way you want it (including some neck relief / curvature) and then you bend a thin levelling beam (the ‘Banana’ as I call it) to match the neck and level away. This method is a little more accurate than levelling with the strings off and the neck flat but more importantly, because the strings are on I can tell when the buzzes and chokes disappear – at which point I can stop – preserving precious fret metal that other methods waste.
That’s great for high frets and for low frets (because a low fret makes the ones either side of it effectively high and causes the same problems as a high fret. When I started, however, I didn’t think that this method could help where ‘fret slap’ was concerned. I make a distinction between what I call ‘Fret Buzz’ (buzz caused by high or low frets found in specific spots on the neck) and ‘Fret Slap’ (a kind of buzz typically felt / heard on every fret of a string all the way up the neck). I worked out that ‘Fret Slap’ was caused by the strings not having quite enough room to move / spin and hitting the frets as they moved. The only way to give the strings enough space (the harder the player’s picking or strumming, the more space was needed) was to raise the action at the bridge end or dial in more neck relief to create a greater curve in the neck. Well – that’s what I thought.
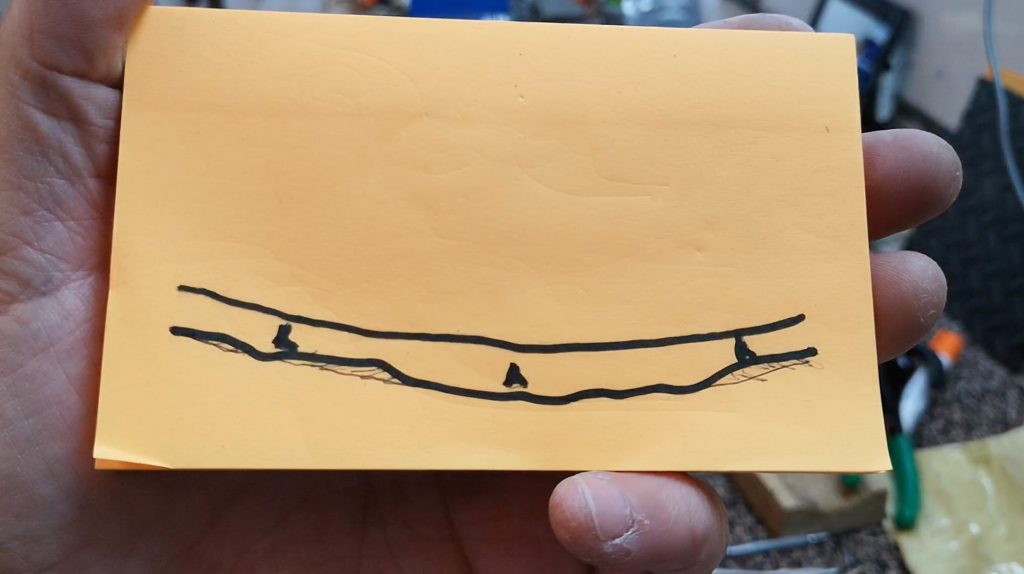
It took me until this year to realise that the Banana did help reduce and even cure ‘Fret Slap’ although to begin with I couldn’t understand how it did it. Eventually I worked out that because I ‘calibrate’ the Banana to the neck’s curve using the three brass feel (effectively ‘sampling’ the curve in 3 points) the Banana curve is always an ‘idealised’ version of the curve extrapolated from those 3 points. The Banana (otherwise known as a ‘truss rod with sandpaper on the underside of the flat bar part’) makes a smooth curve while the actual neck underneath it is anything but. Because wood is organic and springy, because the neck is under longitudinal compression and because manufacturing is relatively crude the actual neck is a bumpy, uneven curve – as shown in my sketch (above).
I finally realised that when I level the ‘bumpy’ curve of the fret tops, I am ‘imposing’ the Banana’s ideal curve onto that irregular, lumpy curve described by the fret tops. The Banana gently ‘scoops’ out that imperfect curve and maps its smooth shape into it – and in doing so, opens up a fraction more room for the strings to move in. While the amount of room created in this way is tiny it is enough for me to hear problemmatic ‘Fret Slap’ reduce and then in most cases disappear completely as I level.
The mark of a great tool is its elegance… as well as its power. I think the DIY ‘Banana’ is one of the best ‘home-made’ tools I’ve had the pleasure of using. I’ve probably done a couple of thousand guitar set ups with it now and I have no plans at all of stopping using it.
There are two lessons in this guitar I’ve just finished: firstly, don’t rout in a hurry and secondly, stick to the sequence you know works!
I learned a while back that when making guitars with snug-fitting bolt-on necks (as opposed to the looser and more adjustable Strat-style fitting) you have to fit the neck and the bridge before routing any pickup cavities. If you have CNC or can work with very accurate templates then it’s tempting to mark up a centre-line with neck pocket, pickup cavities and any bridge cavities all located off that centre-line. But in my experience by the time you’ve routed and finessed the neck pocket and fitted the neck the neck centre-line can wander slightly off the nominal centre-line. And remember, 1mm difference by the end of the neck pocket can turn into 2 or more mm by the time you reach the bridge position. So if you mark and rout everything at the same time you may find the centre-line moves slightly but you’ve already committed to the pickup cavity positions.
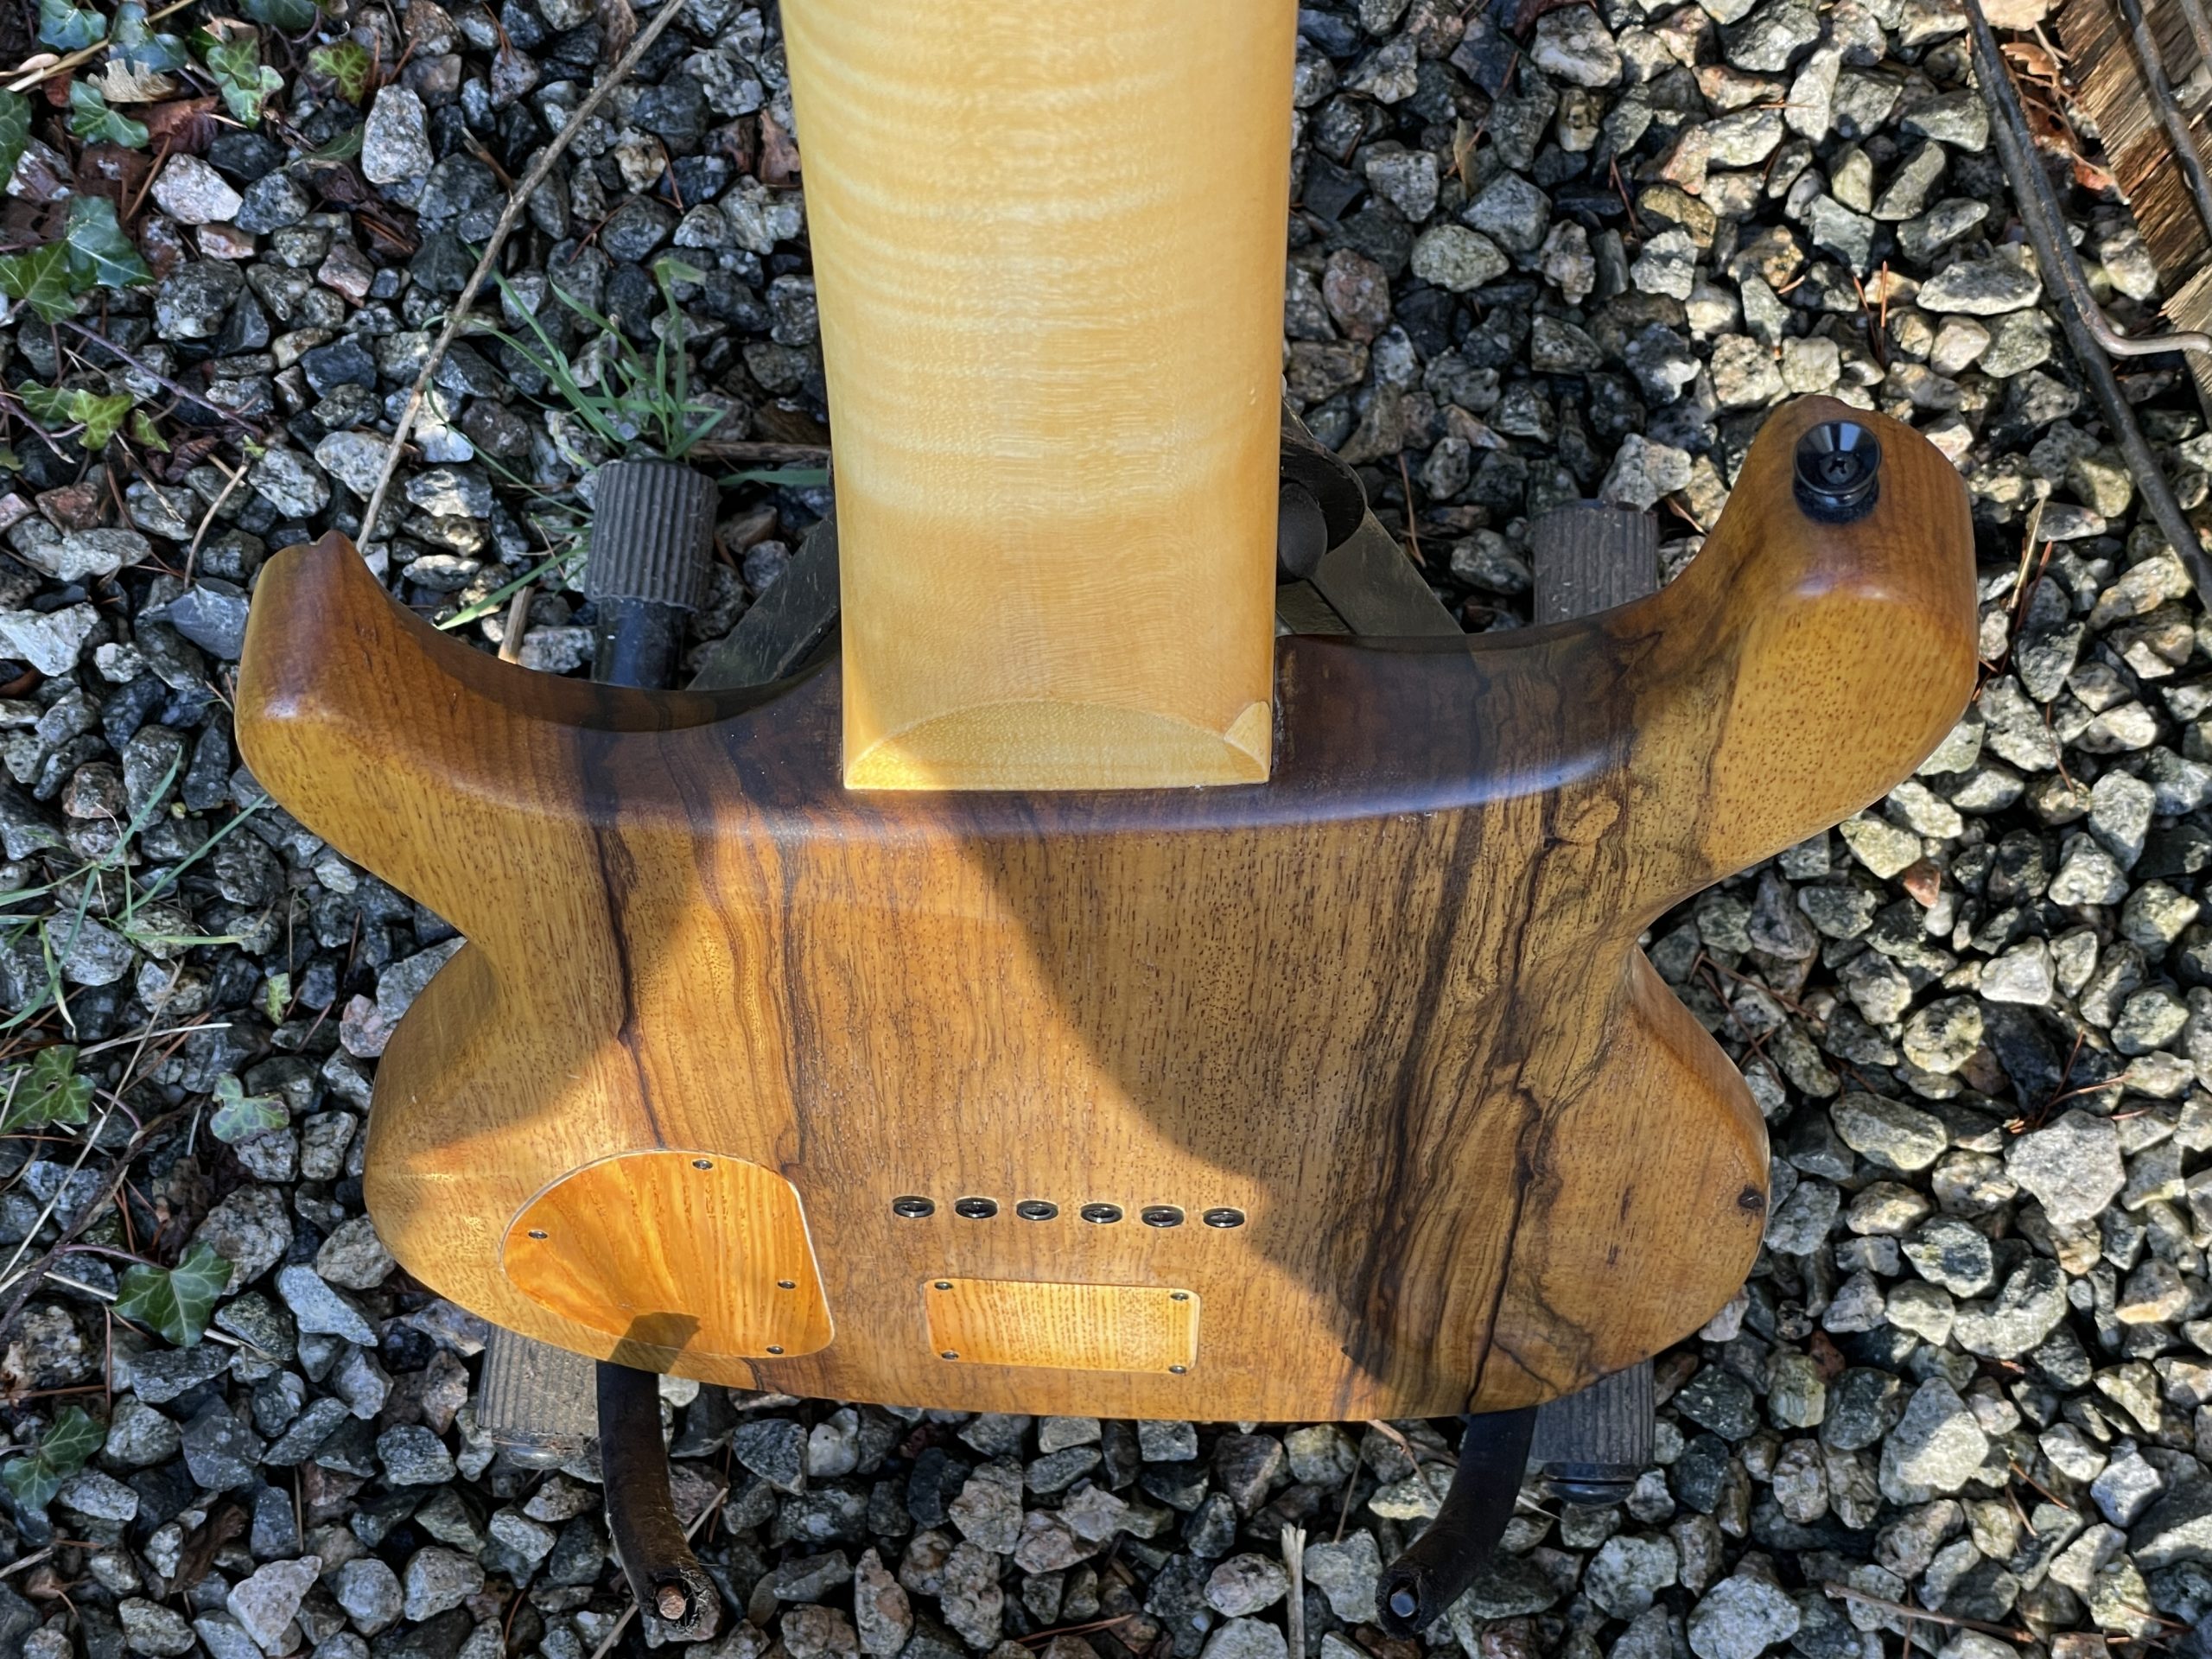
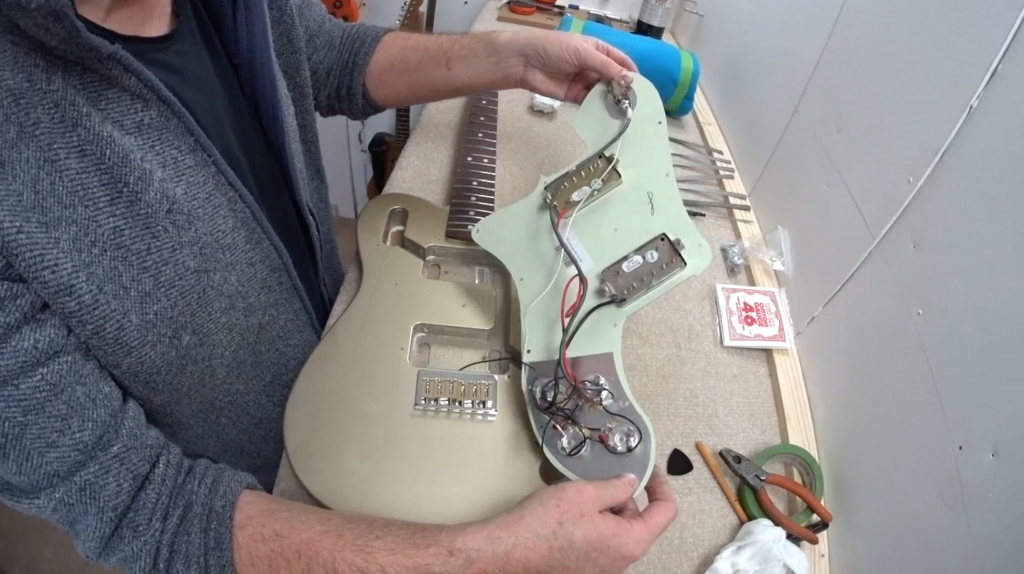
This is what happened on this last build, ‘Trekki 6’. Even though I knew the importance of fitting the neck fully before fitting the bridge and then locating, marking and routing the pickup cavities, I didn’t do it that way. Why? Because I was in a hurry as I had to get all my routing jobs done in one session. At this time I was saving up all my routing jobs for trips to my friend’s workshop (to avoid upsetting neighbours with noise pollution) hence the self-imposed rush.
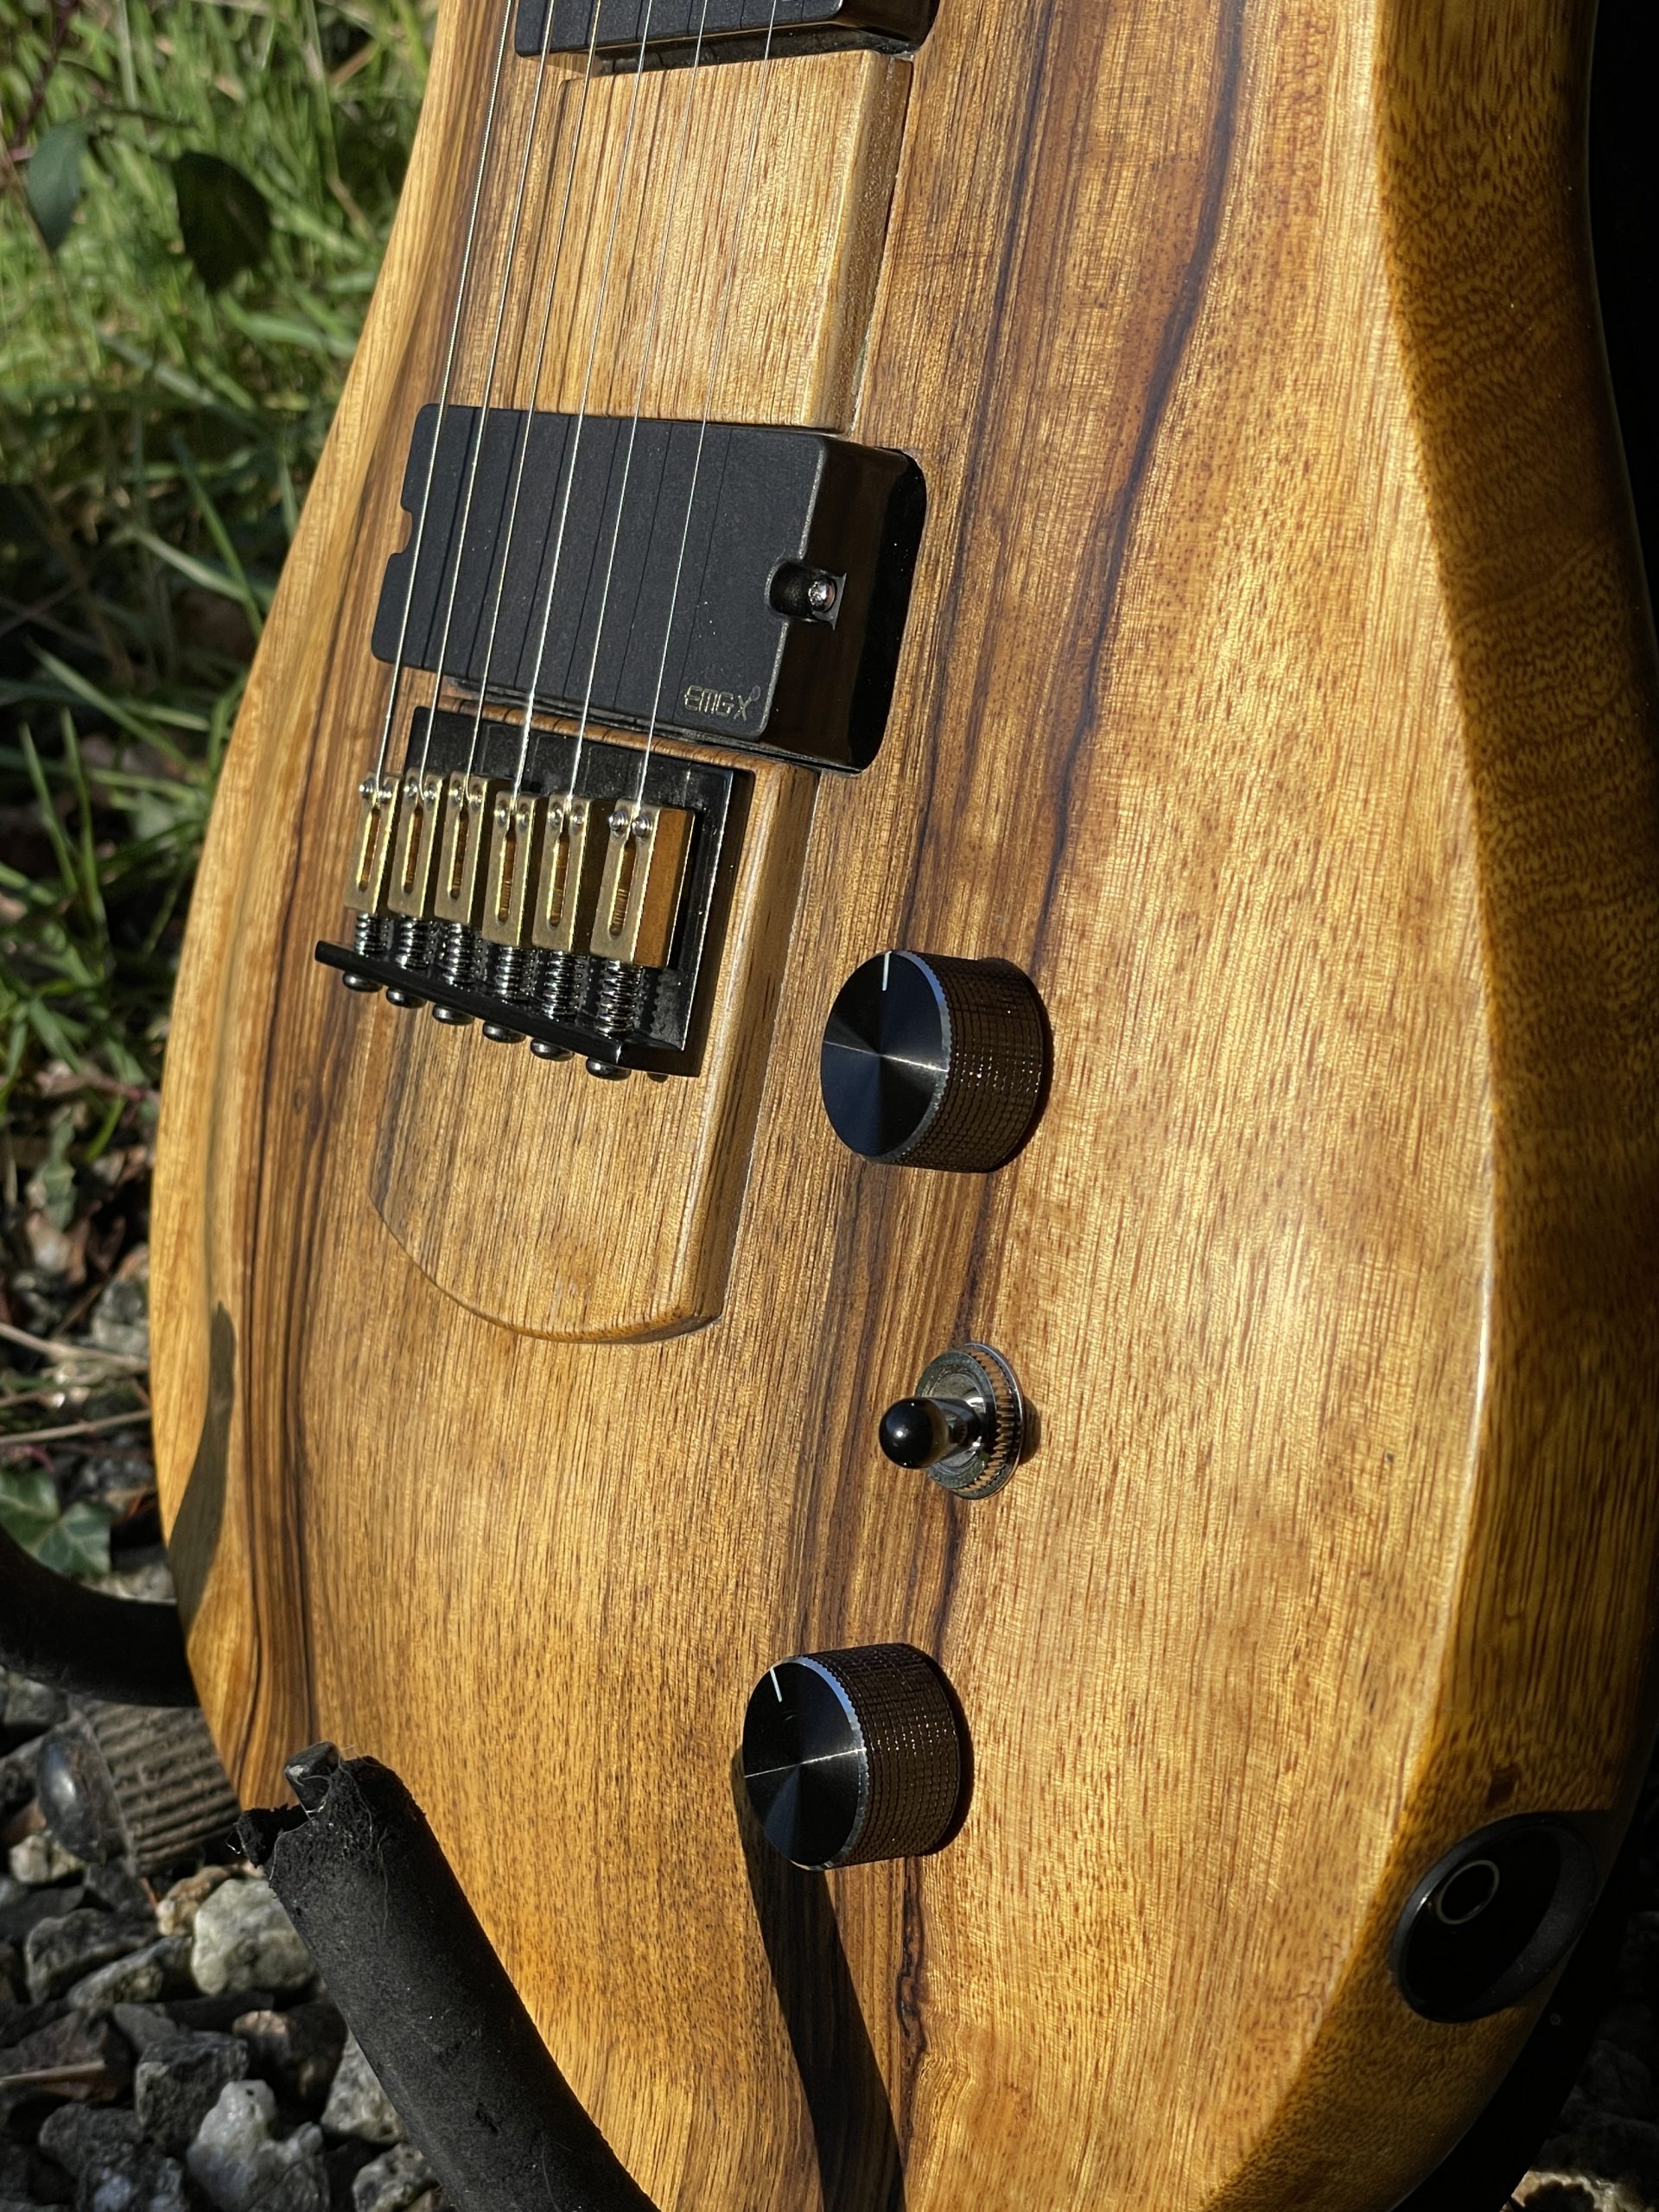
I only really noticed this imbalance when I came to finish this guitar the other day. It became clear that the pickup that I had for the bridge would look very mis-aligned particularly because it had regular pole screws. As it happens, it would have been a poor choice anyway – thanks to Seymour Duncan’s bizarre choice to make a majority of its ‘bridge’ humbuckers 48mm E-to-E pole spacing which guarantees the outer strings don’t sit over the poles – but even worse with this cavity misalignment. I decided that a temporary solution would be to use a pole-less humbucker that I had in the spares box. As you can see it just about works visually and it sounds fine but it’s obvious that by the time we get to the bridge pickup cavity it’s substantially off to one side.
Thankfully this guitar wasn’t made for a customer, so I can afford to hang it up as a ‘keeper’ – and one that I can modify at my own pace. But it is a timely reminder – just at the point where I’m about to start work on my 2nd eBook ‘6 steps to guitar-making heaven’ – of the value of following the correct sequence. Thankfully, also, the recent move to a new workshop means that I can rout at any time I need to, day and night, so that no longer will I put myself under pressure to complete x number of routing jobs in a single session.
As unlikely as it seems, there have been occasions when I notice some damage on a customer’s guitar that they are unaware of. You would think that they’d know every inch and aspect of their guitar whether they’ve had it for years or just bought it from a seller on eBay but it isn’t the case.
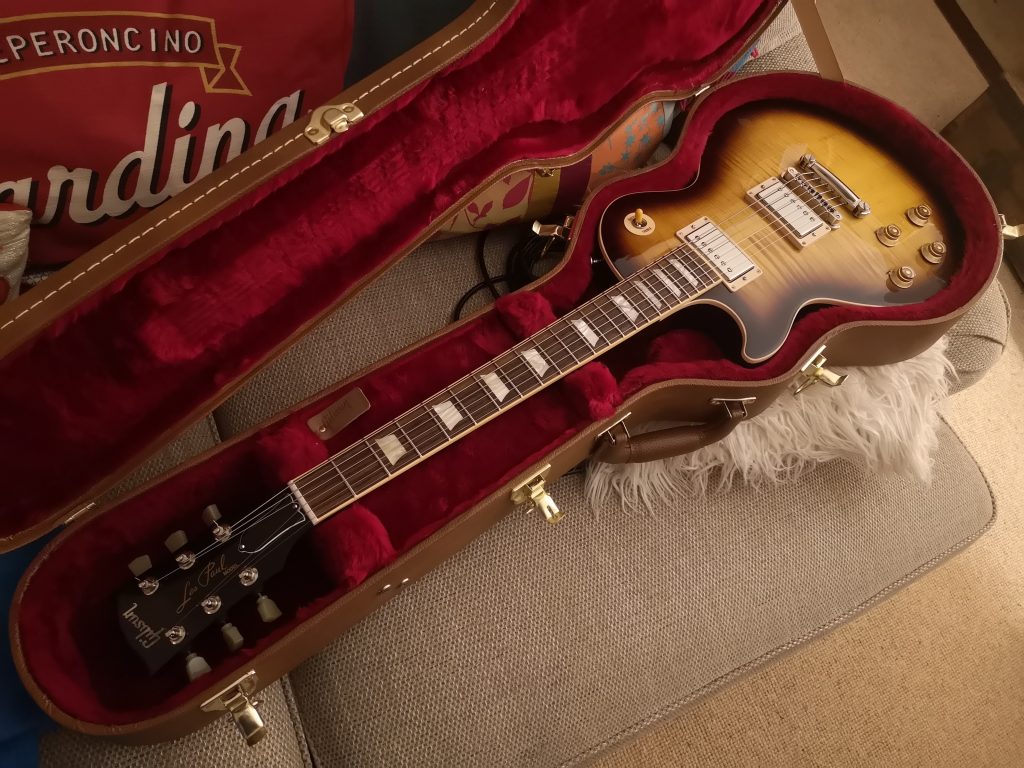
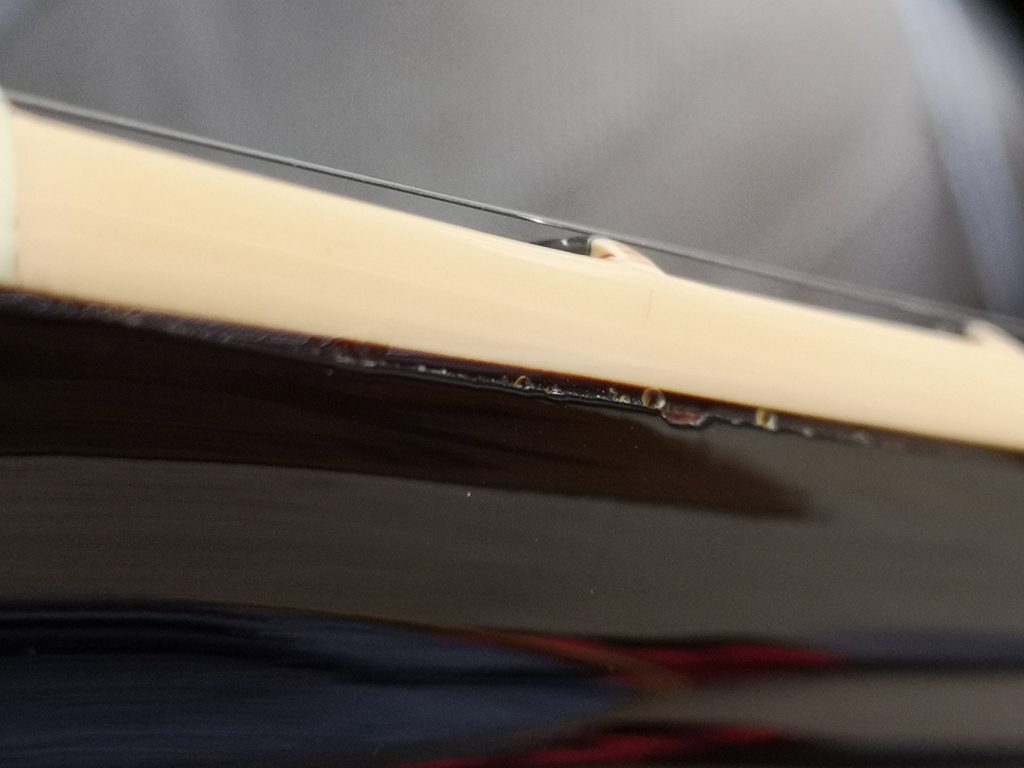
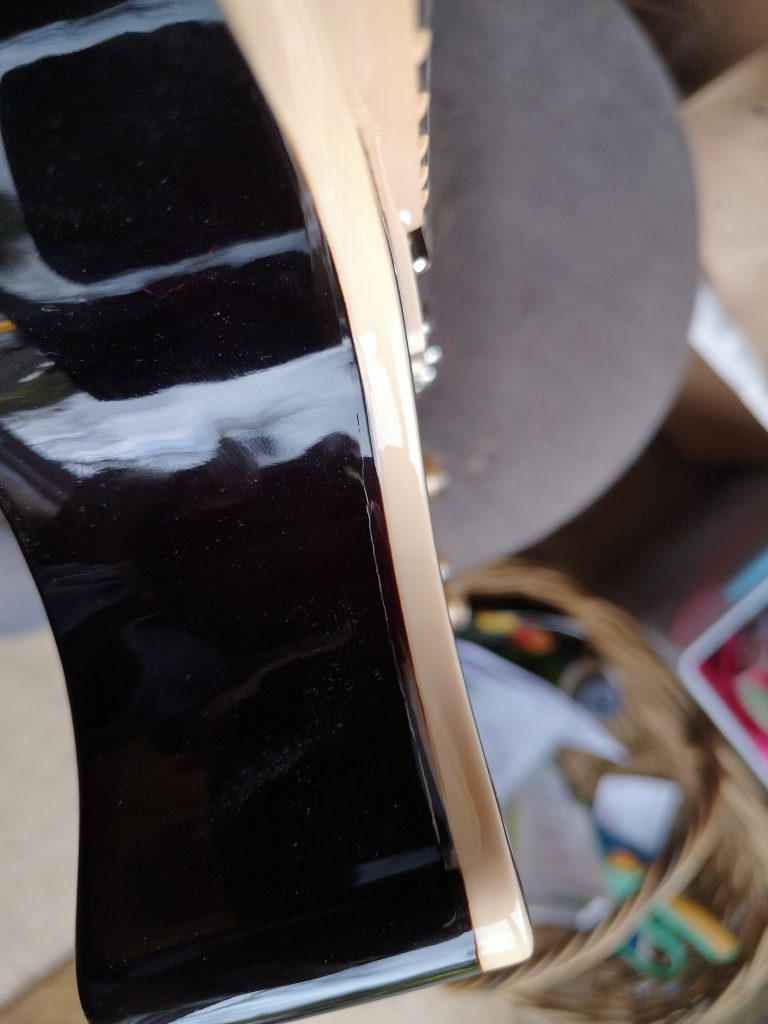
This happened to me at the weekend. I met a customer to collect his Gibson Les Paul and brought it home. Later that evening I took the guitar out of its case to check it over prior to taking it to the workshop for its set up and my fingers detected something amiss with the finish on the neck, on the treble side near the nut. It felt like a raised area; a bulge and although it wasn’t huge it was enough to know that if it was my guitar, I’d feel it every time I played it. On close examination, I found a 2″ long crack in the finish just under the binding and another fine crack about 3″ long inside the cutaway curve, also just under the binding.
After mulling it over for a while, my best guess was that in both places the cracking finish was caused by essentially the same problem: different glued timbers coming slightly apart. On the neck near the 1st fret the crack line was along the join between the rosewood and the underlying mahogany. In the cutaway curve the crack was along the line between the maple cap and the underlying mahogany of the body. Both cracks were visible due to the finish cracking and chipping but it was impossible for me to ascertain the condition of the wood underneath. However, if I’m right and both cracks were due to inadequate glueing and a slight parting of the timbers – then the owner has a fairly expensive repair bill looming if he wants to fix this and retain the guitar’s resale value.
I don’t know the history of this guitar, other than that my customer bought it 2nd hand recently. Why he missed these cracks when buying isn’t clear to me nor (assuming he bought this from somewhere like eBay or Reverb) why he didn’t ask for a refund straight away from the seller. That’s not really any of my business.
What IS my business is the situation that finding an unexpected fault on a guitar leaves me in. The options open to me are either to say nothing and do the set up work I was asked to do or to point the problem out to my customer and offer my recommendation as to remedial action. Not mentioning it is out of the question as far as I’m concerned – in part because if you don’t mention it there’s a chance that the customer will suddenly notice it when he or she gets the guitar back from you and think that the damage occurred in your care!
Honesty is always the best policy – not least because customer trust depends on it. But don’t expect your customer to feel good about it: the fact is that you’ve just peed on what, up until that point, had been a very sunny parade. Sure, they’ll be grateful that you told them your findings… but they’ll still be unhappy because out of the blue their guitar is now going to cost them a few hundred more pounds just to regain it’s market value. If they can get a refund then that’s good news for them but bad news for you as you’ll be boxing it back up without earning the set up fee you might be counting on in these difficult times.
So if you find yourself in this position, take lots of pictures and contact your customer immediately to show and explain to them what you found. Don’t expect a ‘thank you’; not because your customer’s a bad person but because they’re dealing with how THEY feel about not spotting this problem and having a less-than-market value guitar that will now annoy them every time they play it, not thinking about how you feel. And if they DO send the guitar back for a refund, don’t expect them to pay you for the time you spent picking up and assessing the guitar or the time spent taking pictures, doing research and writing detailed emails explaining the problem. Again, not because they’re villains but simply because they’re too busy dealing with their loss and the inconvenience it has caused them to stop and consider what it’s cost you. In this situation the only thing you can do is to make a decision: are you going to write off the time and effort already spent or are you going to ask for a fair fee? If you’re prepared to write it off the challenge will be to not feel bad about it. If you are going to ask for a fair fee, then you’re going to need to be assertive. Being assertive means being very clear with your customer (‘although the circumstances changed and I didn’t do the set up work we originally planned, I DID do the following which took time, expertise and effort…’). Calm, respectful assertiveness is an act of self-respect and worth practicing at every possible opportunity!
If it all sounds a bit complicated and nuanced it’s because, well, communication, honesty and assertiveness IS. So many good guitar techs and luthiers fall down on their customer service because they lack assertiveness and shy away from being completely honest – particularly when they themselves have make a mistake. In this case the customer, despite sounding quite unhappy in his emails and at one point considering coming to collect the guitar right away without having the set up work done, ultimately agreed to having that work done and I made my fee.
As it is I’m looking forward to doing the set up tomorrow and making the guitar play as well as it can (in this case clearing up some fret buzz and high bends that are currently choking out) but I would have loved to be able to fix the cracking issue as well. And there lies another lesson: if it’s not within your field of experience, don’t be tempted to try to fix a problem you didn’t create. On a guitar like a Gibson Les Paul anything less than a professional finish repair won’t do and will devalue the guitar further. In the case of this guitar I was clear from the outset that a ‘value-retaining repair’ was outside my capabilities and I recommended that he find a specialist guitar finisher to do it.
Setting up Stuart’s Chris Shiflett Telecaster marked a special moment: the for-real opening of the new RG workshop. Until this point I’d been focused mainly on getting the place cleaned up and workable-in-able. Now it’s officially up and running 🙂
Looking back there seemed to be a long wait for the tenancy to begin while Clare went through her mastectomy surgery and recover and prepared to start chemotherapy. In my mind I was giving myself until the new year to get the workshop into usable condition, even convincing myself to carry on doing set ups in the shed in the short term. But once the primary workbench was built and carpeted in the new place it felt suddenly right to commit everything and just get going. Stuart’s guitar was the perfect way to kick it all off. Since then I’ve set up a couple more guitars here – at different times of day & night (ah, the luxury!) and several more are en route.
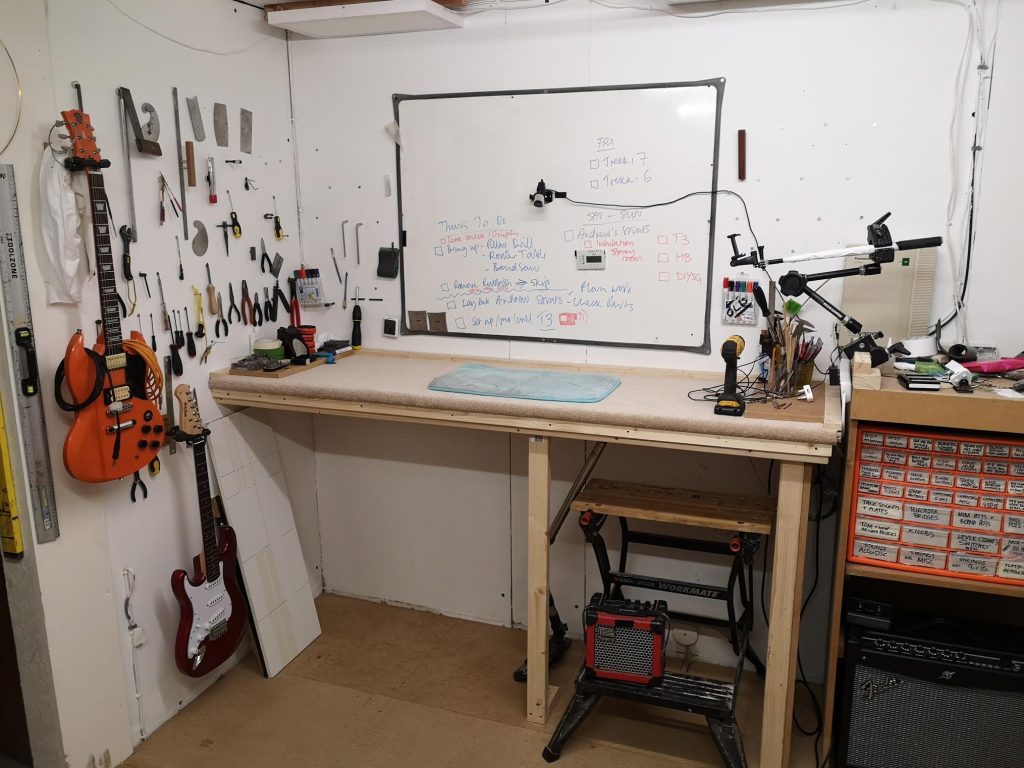
3 weeks after taking possession of the keys the new Reloved Guitars workshop I’ve cleaned it, painted it, climbed over the filthy roof and rigged up buckets to catch leaks, rolled out insulation, laid floorboards, built workbenches and put up shelves. I’ve sprayed some guitars with clear acrylic finish (stuff that couldn’t wait) and done my first paid set up in the new space just this last weekend. There’s a kettle, a water heater for washing up and cleaning things, plenty of space and – because the main room is constructed from the walls of a refrigerated truck – it warms up with body heat alone AND magnets stick to the metal walls. What a bonus! This means that I don’t have to spend a ton trying to heat it (a 15 minute blast with the heater keeps the place warm enough to work for hours) and I can stick all my ‘near-to-hand’ tools right there on the wall where I need them 🙂 I’ve got a couple of my own guitars to play, a newly-acquired 100W Fender amp, a small Roland micro-cube and a DAB radio to keep me entertained. And what don’t we got? We don’t got internet. That’s all.
So three weeks in and I like it. There’s another whole room that I’ve not even started on yet which was a ‘kitchen’ but is likely to become a dedicated spray room. I’ll take my time with that. It’s going to need a thorough clean, a coat of paint and all 3 of my newly-bought rolls of insulation dumping on it’s thin hard-board ceiling. When it’s done (and if I can control the temperature and humidity adequately) then I’ll start using my new Apollo HVLP spray system in there in pursuit of professional-quality finishes for the first time. I’ll also be able to hang guitars and create a space to run the buffer although there will need to be a gap between buffing and spraying as the buffer produces a lot of dust and lint particles. Once the spray room is operational then what is now the ‘temporary spray room’ will become the ‘sawdust / routing’ room and from that point onwards I’ll attempt to isolate the messy woodwork area from the set up, soldering and fretting space and because the spray room is completely separate from the other spaces (with separate doors to vent the fumes through) I should be able to carry on other work without needing to wait for half an hour for the vapours to clear. That’s the plan anyway 🙂
What I’ve learned is pretty simple: 1) don’t be over-ambitious and 2) fake it to make it on those days when you’ve temporarily lost the faith.
1) Don’t be ambitious: part of me thinks that if I’m setting up a new workshop I need to have all the right power tools that I see those other ‘proper’ guitar makers using. Surely it’s not enough *just* to drag my existing tools to a new place and somehow expect it to be better? Well, actually it IS enough. Because the single biggest gain for me in having this particular workshop is the ability to use the tools I currently have any time of the day, any day of the week. And to be able to spray whenever and however often I need to. Those improvements alone will transform what I can do. But I haven’t just dragged across the ‘same old tools’, I’ve also added the Apollo HVLP spray set up. When I had a ‘spare’ £400 in all of the last few months’ uncertainty I risked investing it in this spray unit…because I wanted to add at least ONE significant new capability to Reloved Guitars. So I know how much of a step up this workshop is for me and I’m happy to add just that one single capability… for now.
2) Fake it to make it: there were days when I didn’t think that I’d ever like the feel of this workshop; days when the familiar cosiness of the shed seemed very appealing. So much so that on some days it was all I could do just to make myself go up to the new workshop, dump some tools from the shed, look around a bit and head back home. I even found myself planning to continue using the shed to do set ups until after Christmas… and doing in the workshop only that which couldn’t be done in the shed (guitar modifications, building and spraying). That comforting little self-deception only had to last until I realised that I was quite liking the way it was developing – namely, shortly after building the first workbench and fixing up the ceiling-mounted LED lights. But on those days when my heart wasn’t in it I knew enough to know that the best I could do was to keep doing it; as if I believed in it. As soon as I’d finished the workbench I knew that it didn’t make sense to work in two places at once and I knew that the next set up I did would be in the new workshop, under the bright white lights and talking loudly to the cameras. And so it was!
I read this and thought “my work here is done 🙂 Of course, it’s not always positive feedback. Occasionally passing viewers feel it necessary to tell me how my videos *should* be shorter, or better edited or filmed differently…and so on. I often reply – as politely as I can – that while it may not be obvious to them, my videos are in fact doing exactly what I want them to do. Why then would I change them? Just to please you? Their assumption is that, as a content-maker, I’m trying to please them – but the truth is, I’m absolutely NOT. I know who my market is, the value I’m giving them AND the return I get back from that market.
The reality is that people who don’t like the length / style / lack of editing in my videos aren’t my target market. This is not a convenient coincidence; I planned it to be this way. Being clear about who my target market is (and isn’t) allows me to say “Hey, no problem – I’m probably not the right channel / guitar tech for you” without any bad feeling. I’ve learned that as long as I make the right content for my target market (and don’t compromise chasing likes from everyone) I get everything I need from my channel and content.
As it happens, my channel brings me two main things:
1) new customers for my set up / refurb services who have already decided that they trust & want me to work on their guitars (my primary goal)
2) about $175 a month ad revenue (a nice bonus!)
Ultimately, positive feedback is – for me – just nice; icing on the cake and I want it (and ad revenue) to stay that way. Should I ever find myself chasing likes and ad revenue, I’ll be en-route to a world of clickbait and my ego will be in danger of being sucked into a black hole from which there’s no escape. Best avoid – and the best way to avoid it is to know your market, the benefit you bring it and why…and stick to doing that.
When viewers are kind enough to take the time to thank me for sharing my experience I’m able to keep their words in perspective. “I’m very glad that you found something useful in this video…” is my honest reply.
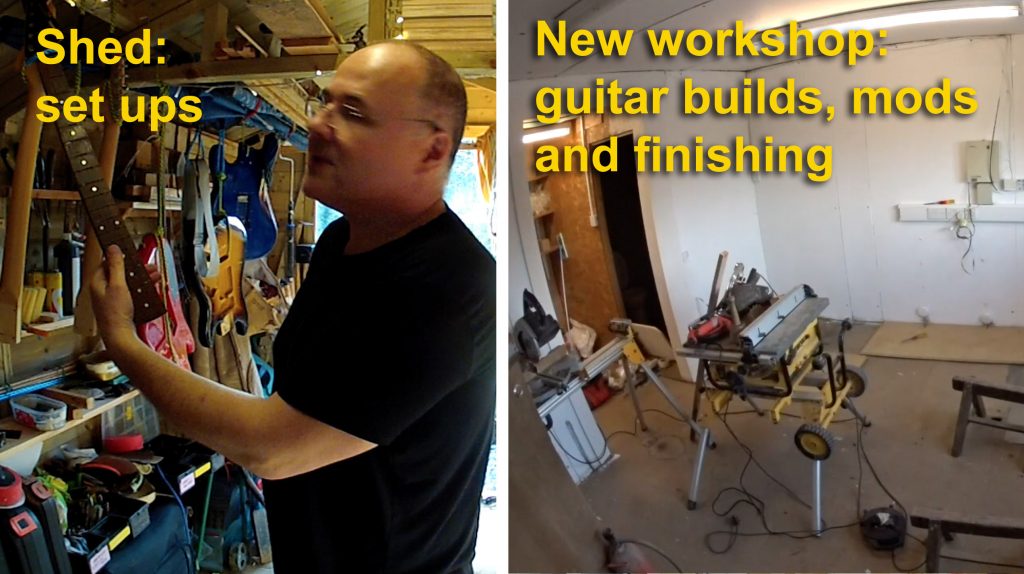
It seems that my plans change just about every day – as soon as they come into contact with realty in fact 🙂 Initially I had wanted to put down stronger flooring, repair holes, add insulation and then build a couple of workbenches in the main ‘office’ room. The focus on the workbenches meant that without realising it I was planning to get the workshop to a point where I could do everything at once: set ups (and videos), guitar making & modifications and finishing. When I stopped to re-think it occurred to me a more realistic plan would be to start out with the new space only doing what I can’t currently do in the shed – and nothing more for the time being. This means ‘noisy machine woodwork’ and ‘smell guitar spraying’ to put it simply.
And from THAT perspective, I don’t YET need the perfect workbenches in the main room; I just need places to stand the key tools (bandsaw, pillar drill, bobbin sander) and a solid bench to rout on with a vice for filing work etc. I already a free-standing bench for wood work and fixing a vice and 2 of the machine stands are MDF cupboards currently in the storage area. So I’m going to focus on spaces in the priority order of outstanding jobs: 1) Spraying 2) guitar mods / making and lastly, 3) set ups / re-fretting etc. So this re-think has turned my priorities upside down – usefully as it happens. I will then have longer to plan and save the money (and find the right materials) for the standing setup bench and the seated soldering bench that eventually will be the key activities in the former ‘office’ space. More than anything, I’m noticing how slow this transition is. It’s limited partly because two days of the week are spent with Clare having chemotherapy, partly because money is short and partly because it’s tiring and I’m older and creakier than I once was!
Today all I managed (with my friend Rod’s help) was to buy the last 3 chipboard floor sheets, to fit a few boxes of things from the shed into the car with the aim of just taking them up to the new workshop. When I arrived I was met with good news – they had emptied the ‘spray room’ of all the site owners’ paperwork / boxes weeks or months earlier than I had anticipated. The bad news (but good in another way) was that they’d also concreted the entry to the steps leading up to the Reloved workshop. I was just able to get across it and take the flooring sheets upstairs but couldn’t get my boxes of shed stuff over the wet cement. So that was that for progress… tomorrow we’ll finish the new flooring in the office space and pack up all Rod’s tools and get them back to his workshop. At that point, it’ll be me, my limited range of tools and plenty of time to make a workable spray ‘booth’ area and a usable ‘sawdust’ area. And after that, I’ve got to finish spraying Andrews left-handed strat bodies before assembling and setting them up. I think once I’ve done that spraying in the new space I’ll feel like it’s real and I’m staying! 🙂
After 5 years I’ve outgrown the 12′ x 8′ shed that we built in 2015. I can barely move now because there’s so much stuff in there but the biggest problem has been there from the start: it’s a shed in a residential neighbourhood. This means that I can’t really run power tools without inconveniencing my neighbours. It’s not something I really thought about back when we had the shed constructed, possibly because at that time I was only setting up guitars rather than making or upgrading them. Truthfully I reached the point that I needed to move and expand about two years ago but I couldn’t figure out how I could afford such a major step up. As a result my work has become increasingly inefficient as I struggled to do jobs by hand rather than use machine tools the jobs really demanded. I had to hunt around for places I could take my workpieces and tools to and do a backlog of routing hurriedly in unfamiliar surroundings. This led to me making mistakes – some of them major – and wasting a ton of time putting them right.
Eventually I got lucky and, thanks to a friend of a friend, have a workshop that is 3 times larger than the shed (at least) and in which I can make noise (and fumes when necessary) at any time, day or night – because it’s on an industrial estate. Best of all – and this is the enabler – the rent is so low that trying this out for a year represents no significant financial risk. It’s this aspect of it that I’m most grateful for: the ability to see just how much I can improve what I do (and how much more enjoyable the work could be) in a space without the limitations that have recently been holding me back.
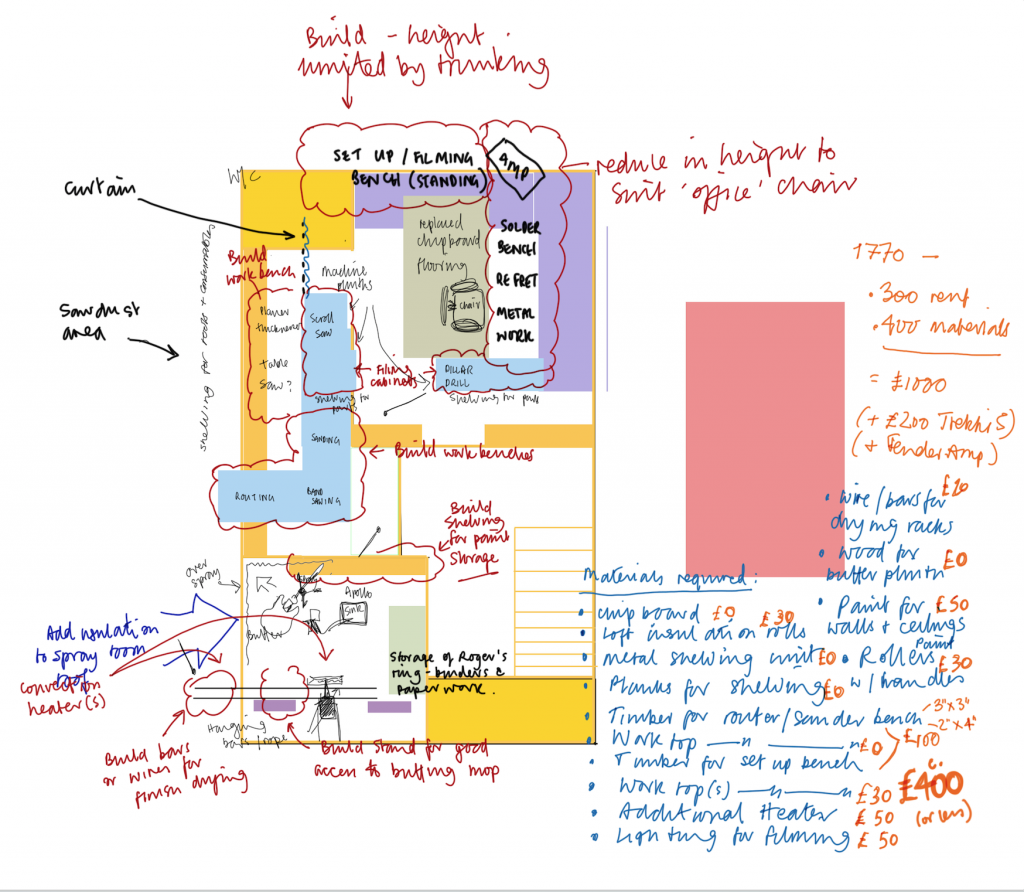
I’ve been sketching how I want to use all this lovely space and freedom with my inexpensive Huion graphics tablet and PhotoShop. The picture here is a first ‘think-through’ – which is more thinking through than I did with the shed when it was first built. But now I have some experience behind me to guide me so I’m enjoying the process of imagining! Whatever I end up doing with the space it’s becoming clear that there are short, mid and long term plans to pay attention to. Right now I’m working towards the short term ‘new Reloved Guitars workshop’.
First, I’ve cleaned the walls and the ceiling of 40 years of brown grime. Next I’m going to paint the walls, the ceiling and the shelves with two coats of white emulsion. Then I’ll dismantle the fixed workbench in the largest room (the ‘office’ space) and put it in the ‘storage area’. When the office room is clear I’ll repair the holes in the floor and one or two holes in the ceiling. And that will be the basics done.
The next step will be to modify the workbench and re-built it along the wall that’s going to be my video backdrop. This will be the primary set-up bench where filming will take place. When that’s done, I will then remove two MDF cupboards from the storage space and convert the end of the storage space where they were into a short-term spraying space. In that space I’ll be able to experiment with my heater and the new de-humidifier I’ve bought to create a workable rattle-can spray environment with a focus on completing a number of guitars already in progress. In the future the spray room will be in the 3rd (large) room that is currently a temporary holding-pen for the site owner’s paper accounts – and the plan will be to have my HVLP spray system (not yet used), my buffing wheel and various stands and hanging racks in that space. But this is a couple of months away. The priority is a working bench where I can do and film set ups and a small, temporary spray booth. The rest – like the 2nd large workbench for soldering, fretwork and metalwork – will have to develop more slowly.
In the two months I’ve been waiting to get started with this transition from shed to workshop it has felt a mixture of daunting and exciting. It’s not perfect and I won’t be able to make it perfect either – but it will be good enough to set up, modify and make guitars in ways that I’ve not yet been able to do. Yes, scrubbing the ceiling with a mop and sponge feels like grindingly slow progress – but right now I’ve got 20L of paint in the back of the car, a load of rollers, screws and 4m x 1m new carpet for both the workbench tops. That feels good – and by the end of this weekend the place will be freshly painted white, some new flooring will be down and the first bench will be constructed and covered. That feels like a big step towards the future!
That’s not a typo; I didn’t mean £150. For just £1.50 and 30 minutes of your time you can transform your guitar – even if it has the nastiest plastic nut fitted. The secret of this is the ‘V’ shaped jeweller’s file. A complete set of diamond-coated jeweller’s files (or non-diamond-coated versions of the same) cost around £8 on eBay or Amazon… but since you only need the ‘V’ shaped one, let’s call it £1.
If you do nothing else to your cheap (possibly unplayable!) guitar, take this £1 file and use it to cut the nut slots down until the strings sit about 0.3-0.4mm above the 1st fret. If you have feeler gauges use these; if not find something that IS 0.3mm and use that (there’s a supplier on Amazon / eBay that sells stainless steel 0.3mm picks for about 50p for example!).
Once you’ve got all your strings at 0.3-0.4mm over the 1st fret you’ll have a nut that looks like the inside of a shark’s mouth BUT you’ll be amazed at two things: first, your guitar will suddenly feel really easy to play – and that’s without even touching the bridge action and second, the guitar stays in tune even though you know the strings are sitting in the tip of a ‘V’ notch (assuming you’ve stretched out your new strings until there is no more detuning when you pull them hard or bend a huge note…)
If the shark’s teeth offend you (rest assured they WILL offend the guitar connoiseurs out there partly because of how they look but mostly because you had the cheek not to spend £100+ on a set of Japanese nut files!) you can file down all the excess material above the strings. Don’t be afraid to do this: that material is now pointless; it’s not doing anything. You DO need to stop before you eradicate the slot altogether – the string has to have enough depth of slot to sit in to stop it moving sideways – but that’s not hard to get right after a few tries.
Presto! A massive £1 improvement that will have taken you about 30 minutes. Ok, £1.50 if you include the 0.3mm guitar pick 🙂