Back in the summer I bought the cheapest guitar body I could find – a sub-£30 ‘candlenut’ wood Strat shaped body direct from China. To go with it I also bought a £20 Chinese ‘strat-style’ neck. I’ve used these necks before (and up-cycled plenty of them as well) and they’re not a bad start-point. But for this fun build I didn’t want to re-fret although I did slightly re-shape the headstock slim down the back of the neck a little.
Now… as it happens, this experiment was compromised because I chose to use some decent quality components: some old Seymour Duncan ‘Livewire’ active single coil pickups and some Gotoh locking tuners, both donated by Adam Toms. I tweaked and fitted a brass adjustable nut that I’d bought from China and finished the candlenut body with the left-overs from just about every nitro spray can left over in the shed.
I’d never played with active pickups before… and this alone made it worth building the guitar. I had to velcro lead blocks between the pickups to balance out the ridiculously light body – oh, and I fitted a decent Wilkinson tremolo bridge because I happened to have a spare one. To accommodate the two 9V batteries I routed a cavity in the back of the guitar and wired everything up. I did everything in cautious stages with this build on the basis that if, at any point, it wasn’t working or worth continuing then it was going in the burner. As it happens, at each stage the guitar told me “Yes! Continue!” 🙂
Having got the geometry right and a decent action, the thing played and the pickups were GREAT fun, full of dynamics inviting me to hit them hard and gently to exploit the range of tone. I was really glad I’d gone to the trouble to try out these active pickups. So I levelled and crowned the frets but put off polishing them out until I’d played the guitar for a few weeks. And I’ve been playing it ever since. It’s currently my ‘go-to’ late night guitar to run through a loaned Fender Mustang III 100w mixed in with Spotify tunes to play along with and out through headphones.
So can you make a good guitar from cheap parts? The answer is YES with a couple of asterisks attached. • First, you need to make sure the cheap body balances with the neck. I had to weigh it down with lead. Neck-heaviness ruins the playing experience particularly if you’re standing up with the guitar on a strap.
• Next you need to level the frets on your cheap neck to get a decent low, buzz and choke-free action – and you need to get the nut right so that it will play and stay in tune.
• Finally, and possibly most important of all you want to build this guitar around a set of pickups that sound good to your ears. If you’ve got some spare cash, put it here (and not in the body) because if this build doesn’t work out for you, you can always remove these pickups and use them somewhere else later.
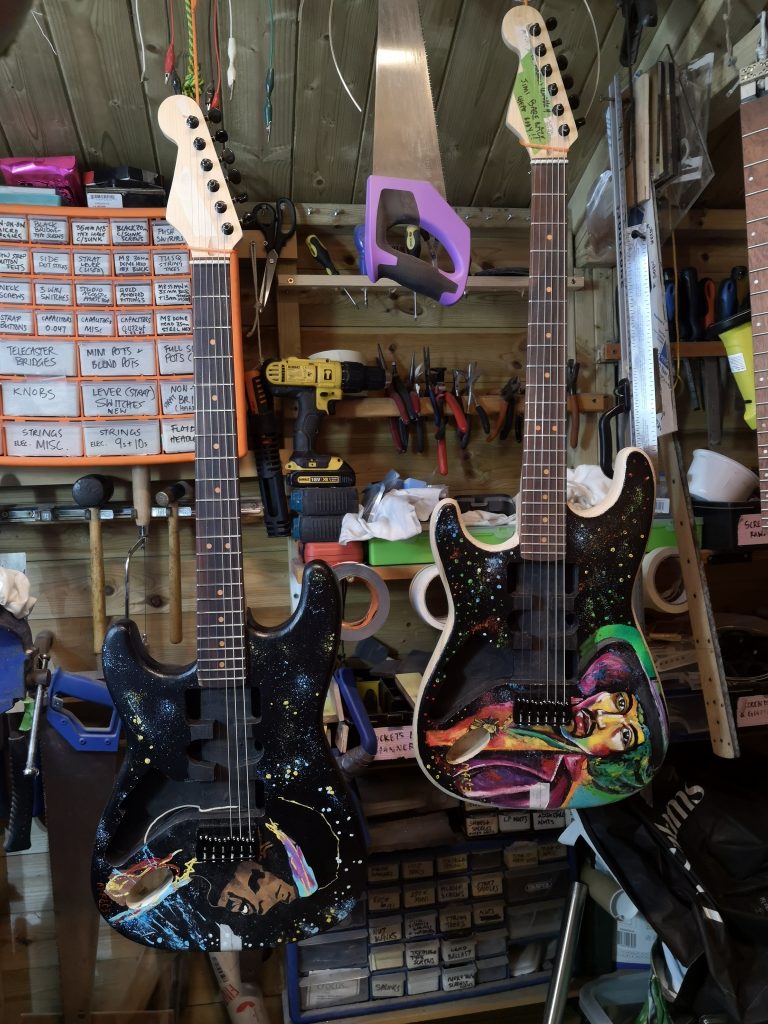
I’m putting together 5 left-handed strats for a customer, all of them with acrylic Hendrix portraits on them and all of them featuring a range of parts ranging from mid-priced down to dirt-cheap. The first two that I’m working on have bodies made from a wood that sometimes gets called ‘candlenut’. It’s soft, easily dented, fairly unattractive to look at and very very light. It’s probably just about the cheapest Strat body you can buy online anywhere at around £30 each. Many builders would scoff at such a cheap and nasty body – but as I recently made myself a strat with one and it’s currently my ‘go to’ guitar I’m not one of them. The necks for all 5 of these strats are similarly-cheap Chinese left-handed ‘strat-style’ necks. The fret ends are a little sharp and some of the frets aren’t seated properly but overall they’re playable – as the neck on my recent blue build attests. The biggest challenge is mating the necks to the bodies; they definitely aren’t made to fit together but with some modification I’m making it work. On the first 2 I’ve located and fitted the bridges (inexpensive HipShot copies), fitted the tuners, attached the necks and got the geometry right. Next stop, do the same neck / body fitting with guitars 3 and 4 which have nice quality Guitarbuild.co.uk swamp ash bodies and cheap Chinese necks and then spray all 4 with an acrylic satin topcoat. A problem with strats 1 and 2 (the candlenut bodied ones) is that they’re very likely to be neck heavy because that wood is SO light. On my blue strat I’ve fitted lead in any / all the available space under the pickguard to rebalance things so that may be necessary on these two. The Chinese necks came with right handed plastic nuts which went straight in the bin and have been replaced by Tusq nuts custom cut and filed to a very low and light 1st fret action. I’ve also shielded the cavities with conductive paint which will be grounded to make a ‘Faraday cage’ to reduce the amount of unwanted RF interference.
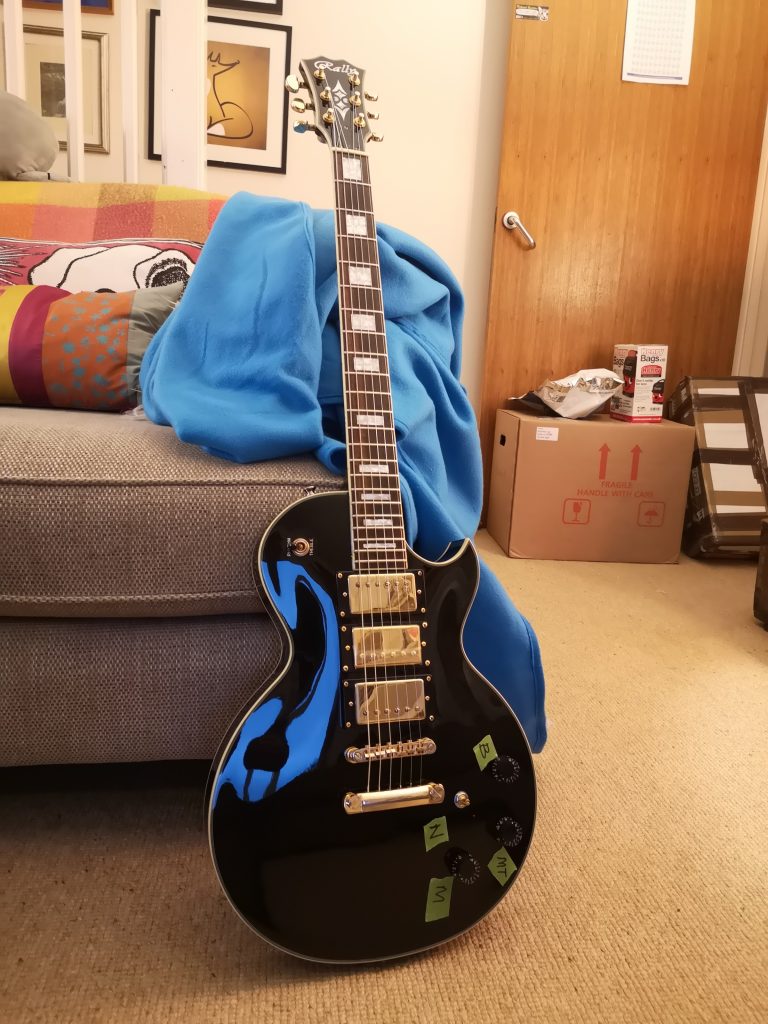
Well, here it is – the Rally GL400 upgraded to a ‘Black Beauty’ style 3-pickup guitar. I’m happy with how this went and also with how it sounds now. I think (it’s hard to be sure) that the middle pickup is ‘out of phase’ with the other two – but the effect is very subtle. On many guitars the ‘OOP’ tone can be a fully scooped, thin sound. But on this it’s just a hint – and because the middle pickup has its own volume control you can feed (or blend) in as much ‘OOP’ effect as you like via that volume knob.
The only downside of this upgrade was that I managed to break one of the CTS pots while tightening it up. The circuitboard ‘wafer’ stuff broke and I think the output got disconnected. Whatever it was I swapped it out for a full-size CTS pot which fixed the issue. Overall these Rally GL series Les Paul copies are superb and this job has me hankering after another one…. soon! In case you were wondering, the missing knob was rescued from the shed and re-attached and the green tape labels are to remind the owner of the new configuration which is basically Neck Vol, Bridge Vol, Middle Vol and Master tone.
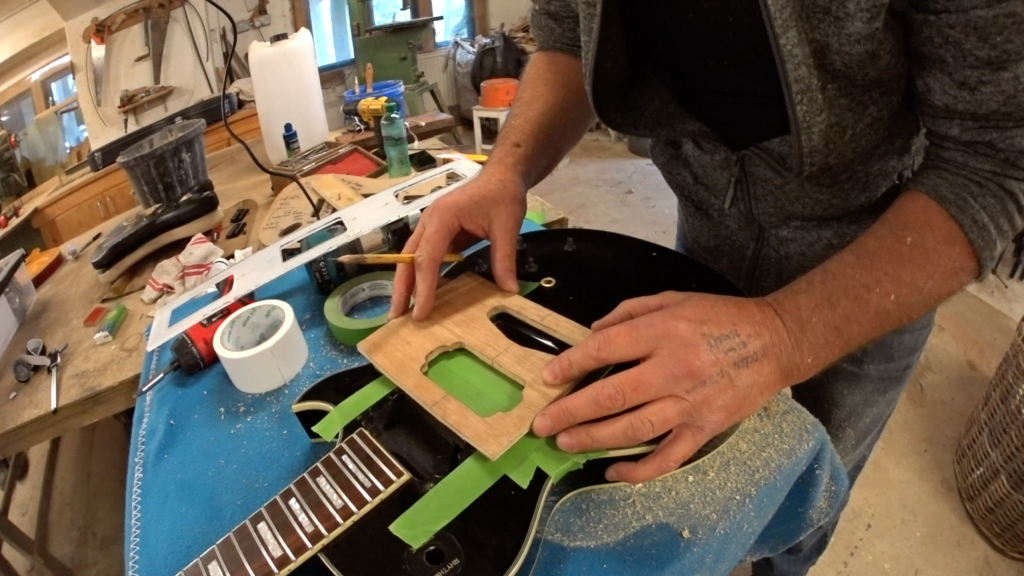
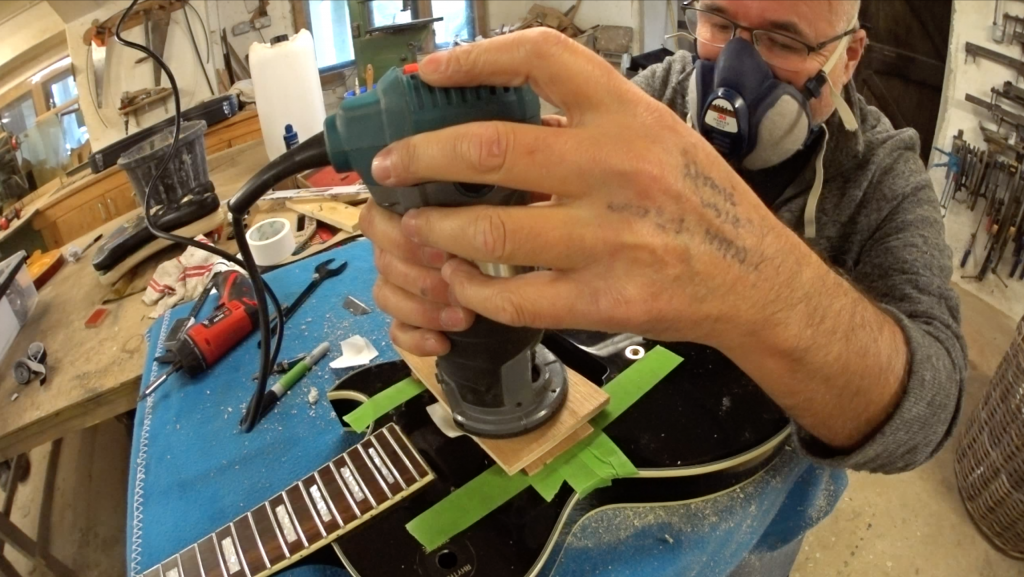
Routing an extra pickup in this Rally GL400 to create a ‘Black Beauty’-style 3 pickup Les Paul copy was a technique challenge. Because of the carved top there’s nowhere flat to anchor the humbucker cavity router template. Holding the template still against the guitar body is critical to ensure a sharp and accurate cut out but normally this is done either with Duck Permanent double-sided carpet tape (amazing for holding templates) or careful screwing of the template to hidden parts of the guitar body.
I *could* have made an extended template and screwed it into the existing humbucker holes. That would have secured it against the guitar top but it would still have needed buttressing either side to prevent the template rocking. In the end, I chose to use a strip of the tape down the centre of the template and to buttress it under either overhanging side to minimise rocking.
Unless they’re screwed firmly in place with multiple screws, templates are always at risk of wandering slightly and this happens if / when the router pushes against the inner edges of the template. In this case, the risk of wandering was even higher so it was critical to assess whether it was possible to rout this without moving the template.I’ve learned in the past that the more you take (i.e. the deeper you set your router cut) the more force you’re likely to use in holding and moving the router. This is in part because of the need to restrain the router (it’s more likely to snatch and jump when dealing with deeper cuts) and the need to push it through the material. When this ‘firmness’ of grip meets the sides of a weakly-fixed template it can get messy.
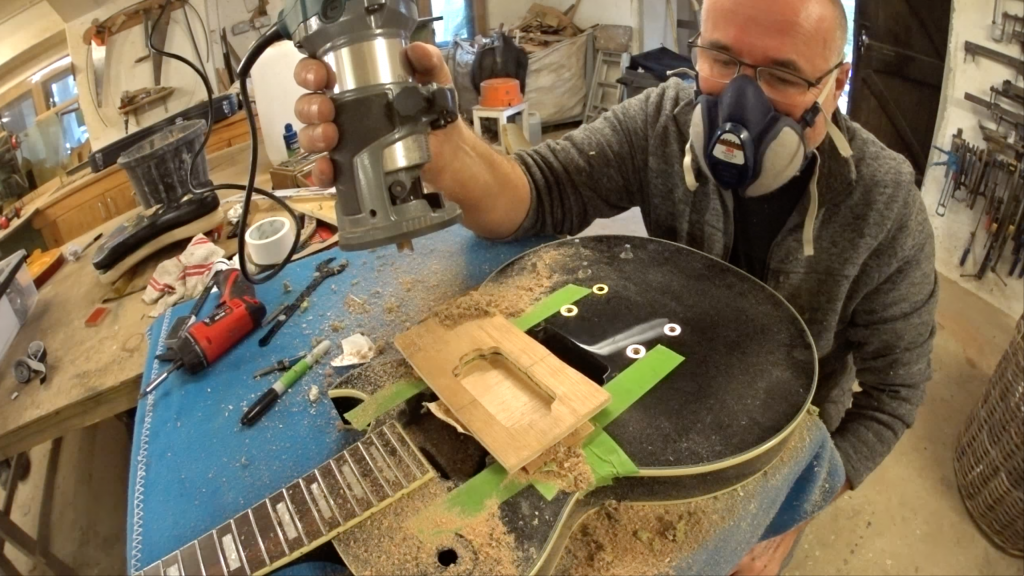
So I learned to a) make more shallow passes and be prepared to take more time and b) consciously avoid pushing against the template inner edge. To achieve this, focus on removing from the inside out without touching the edge – until you’ve left only a 1mm ‘ring’ of wood between the router and the template edge. Then gently allow the router bearing to meet the template edge and follow it around but with as little pressure as possible.
In practice this worked out fine with this rout – and in reality, the template was very, very lightly fixed. Ultimately, judging whether or not the template is even fixed enough to do the job as described is a matter of experience; suffice to say it may surprise you how little force the template needs to be fixed with to do a good job. In the same way, you have to also judge whether there’s enough mass in the work-piece vs. the torque of the router you’re using to require restraining it or not. In this case, the guitar was heavy and stable so it wasn’t necessary to lock it down.
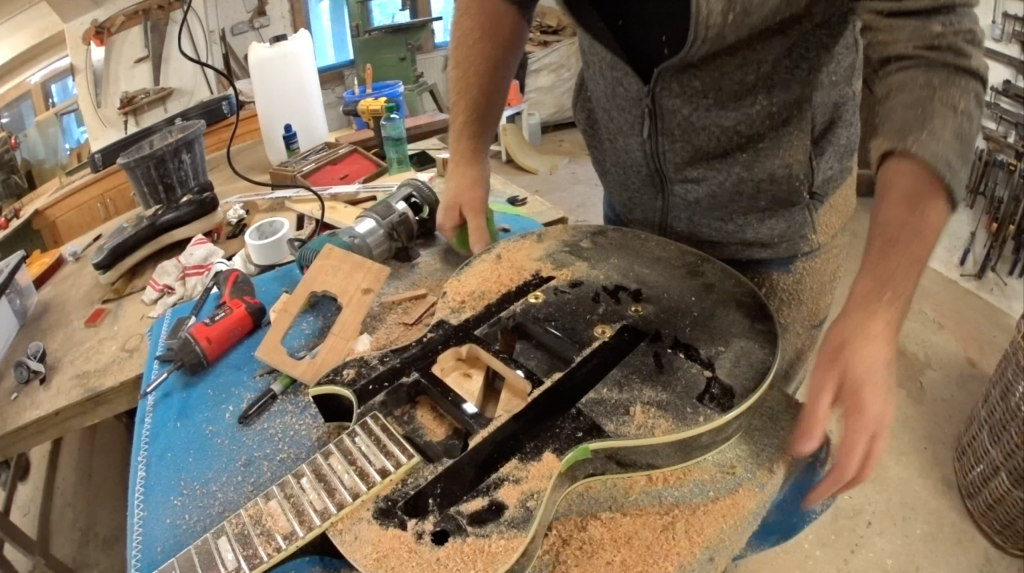
Michael’s Rally GL400 in black with gold and double-bound body is in for a new middle pickup to convert it to a ‘Black Beauty’. For this upgrade I’ll rout a new pickup cavity between the original two and after shielding the cavity, will install a new IronGear Blues Engine bridge pickup. While many ‘Black Beauty’ guitars feature a neck pickup in the middle position, I selected the bridge pickup in this case because its resistance value was nicely between the Rally original bridge and neck values.
Just in case you’ve never played one, don’t turn down a Rally Les Paul copy if you get a chance to buy one second hand. They’re in my book far and away the best LP copies out there. The build is superb and the pickups are amazing. And they usually came out of the factory with very low actions and few, if any, high frets. Amazing quality. The two models to look out for are the Rally GL300 – almost identical to this but single-bound top and a variety of colours (cherry burst, lemonburst, gold top, black and crimson-burst…) and this model, the GL400. The other slightly quirky LP styles plus the other shapes in the Rally catalogue are good but not the outstandingly good that characterises their LP copies.
I’m fitting 4 new CTS mini pots on this guitar mainly because the space in the cavity is too tight for full size and to keep control of the budget we don’t want to be enlarging the cavity (whether with chisels, Dremels or routers…).
What a Beauty this will be after its upgrade. The set up is already just about spot on so we won’t need to make any adjustments there 🙂 I’ll add a gallery of pictures below when the work is done.
I’m starting to get nervous and excited because from Nov 1 I will have the keys to a unit on a nearby industrial estate and will be getting it ready to become the new, larger Reloved Guitars base.
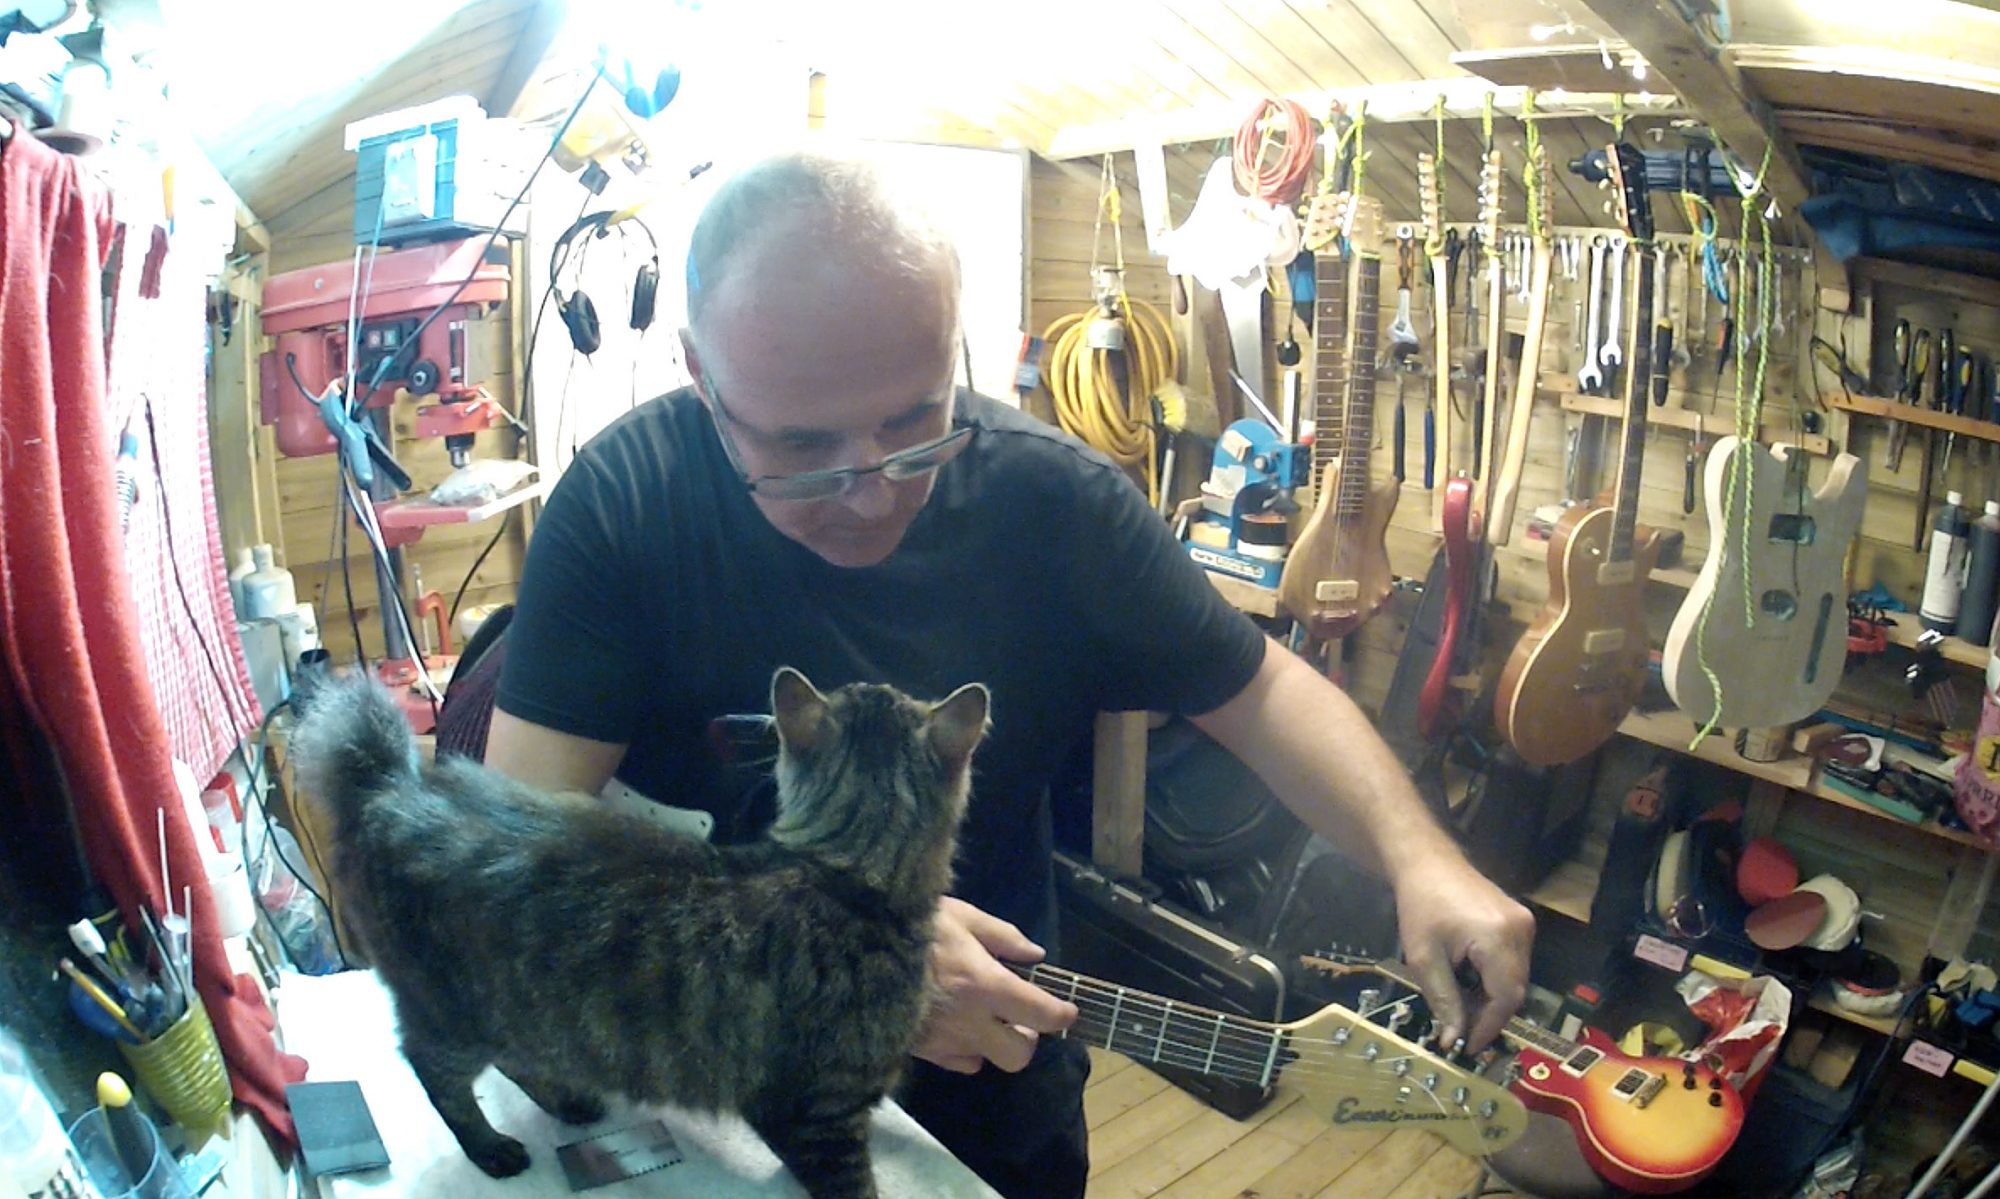
It’s an inevitability that you outgrow the first workshop that you start out in – whether it’s a spare room in your house, a shed, a garage or even a small lock-up space. If you stay doing what you’re doing; if you still enjoy doing it the chances are that you’re getting better at doing it. And if all 3 of the above apply, then it’s likely you’ll make enough money to call what you’re doing a business and a viable one at that. It’s highly likely that some time (quite a long time!) before you reach that point you’ll have run out room in your space and you’ll have become a ‘snug operator’. I hit that point a couple of years ago; and at that point my shed workshop felt like running a guitar business while sailing single-handedly around the world in a small yacht 🙂
Working in such a small space forces you to develop cute cute and inventive solutions to problems which in my case lent the workshop a busy, slightly ‘Heath Robinson’ feel with things hanging everywhere and tools fitted into niches and cubbyholes all over the place. The plus side of this kind of space is that you know where everything is and you’re very clear what you CAN and CAN’T do in your workshop – so you work within your limitations. Which of course brings it’s own problem otherwise known as a ‘familiar rut’ 🙂
I knew that I had outgrown the shed workshop at the point where I became aware of how much it was slowing me down and how inefficient it was making me. This really became apparent when I started making custom guitars to order because it’s at that point I started really looking at how much time and effort went into making them. The shed was good for set ups and small modifications but it was just not geared to making guitars efficiently or at a consistent level of quality. I was lucky in that I was able to sell most of the guitars I made in this highly inefficient way and that quality issues were small enough to be forgiven by customers. But the truth was that making guitars in this way simply wasn’t efficient enough or even financially profitable when time was factored in. Because I was lacking certain tools I had to achieve the same ends in different, less efficient ways. Even if I could have afforded the right tool, I didn’t have the space to fit it in. And on top of that was an over-arching limitation that many amateur guitar-makers will struggle with: the right of our residential neighbours not to have to listen to whining machinery or smell paint fumes.
RG-WSHOP-Plan
Image 1 of 1
So eventually the time came where I either moved and expanded the business…. or stopped doing it altogether. I took a look at everything I had achieved in developing Reloved Guitars from scratch, at the feedback and reputation that I had earned and at the friendships and customer relationships I’d gained along the way. On top of that I recognised the skills I have acquired over the years, the enjoyment and satisfaction that Reloved Guitars has given me and the fact that I’m not likely to get a ‘job’ working for anyone else in the near future in this economic climate. On top of that there was one more impetus: if I’ve achieved all that in a small shed, what else could I achieve with more space and (over time) better equipment? With all of that in mind, I decided it was time to move and expand 🙂
Below is my first ‘plan’ for the new space. By the front door in our home is a small – but growing – collection of unopened boxes containing ‘things for the new workshop’. Right now it consists of a woodworking vice, a box of Henry the Hoover bags (for the clean up), an Apollo Pro Spray HVLP system and a new 3M paint mask. Right there is a major ‘step-up’ for Reloved Guitars – the ability to do professional spray jobs.
For years I’ve been buying guitar hook-up wire in the hope of finding the kind of wire that’s insulated in soft, flexible rubber rather than the usual hard, unbending PVC. I must have seen it in an electrics cavity somewhere and thought “I want wire like THIS!”.
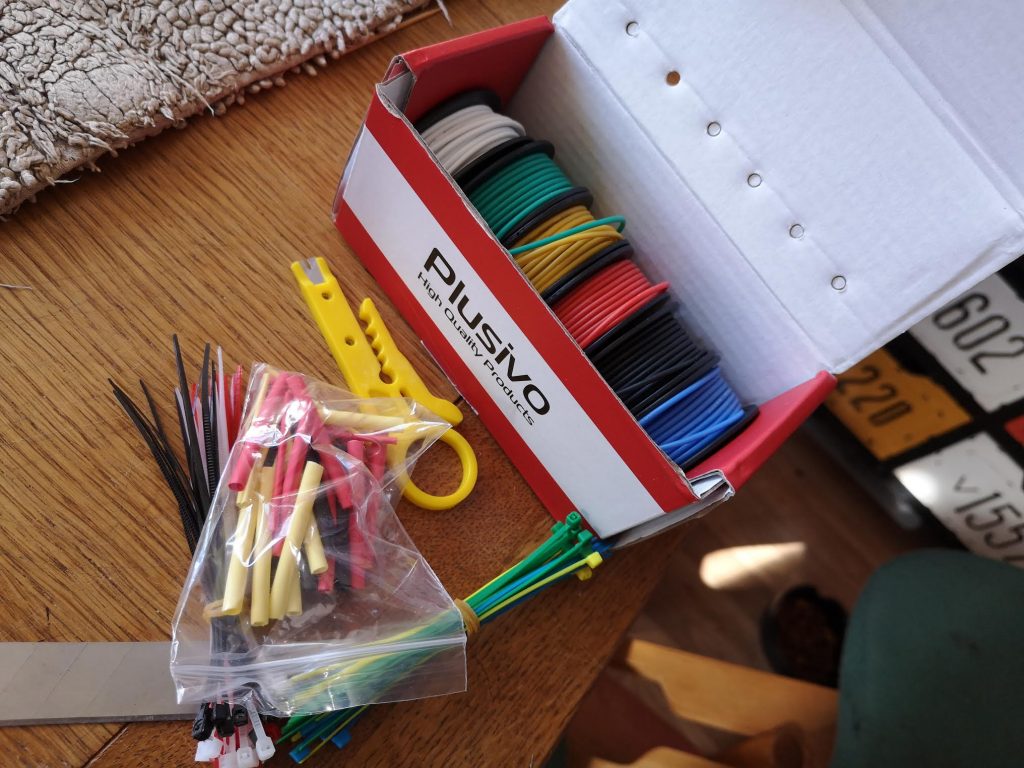
Suffice to say I didn’t find it, mainly because I didn’t really know what to call it. That’s a real downside of the Google world. In that situation, to stand any chance of finding the thing you want, you’re going to have to come at it sideways using all your lateral-thinking and semantic-indexing skills. Somehow yesterday I hit on the word ‘silicone’ for the first time and that led me to this neat little kit.
It arrived today and although I haven’t yet used it the wire feels great; soft and bendy and the it feeds the different coloured wire out of little holes in the box. I can’t tell you how pleased I am with it 🙂
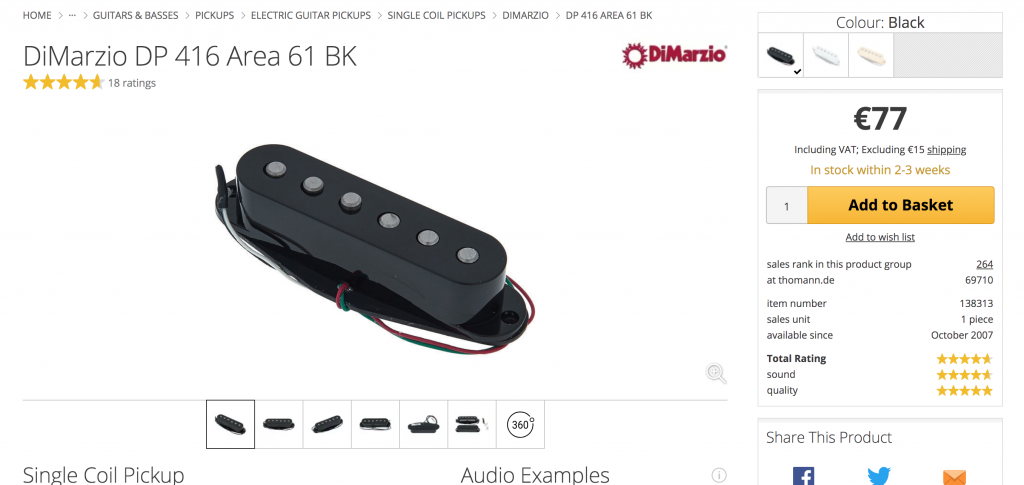
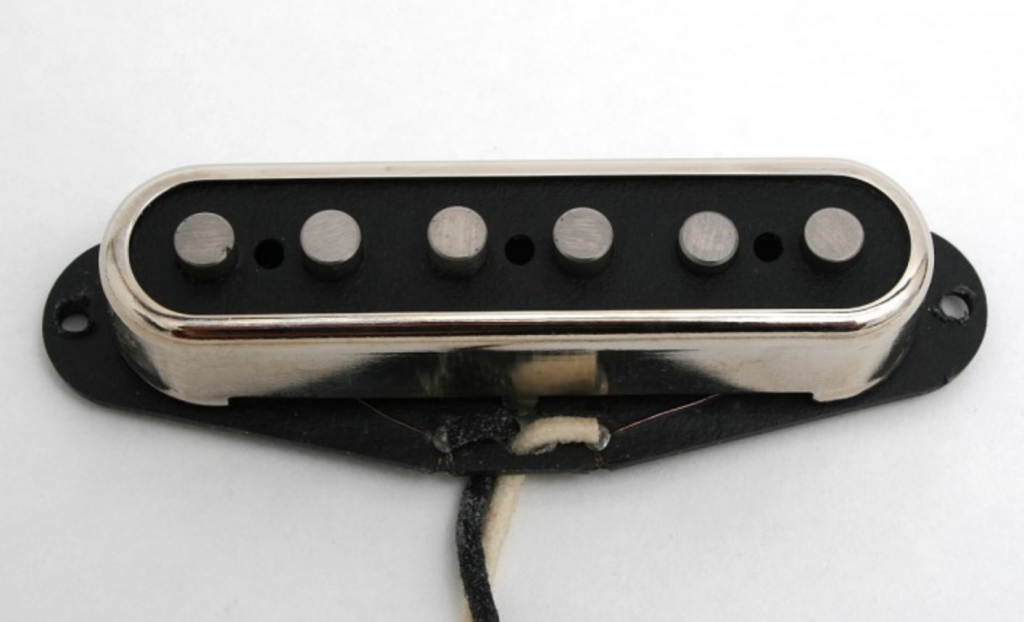
In other buying news; I settled on a hum-free Di Marzio ‘single coil’ pickup for the middle position on my upcoming ‘Trekki 6’ custom build. In the end I made the balanced output the priority combined with ‘hum-free’ construction and black cover. It’s also a DiMarzio which I’ve not had enough experience of yet, despite the fact that they have an impressive range of pickups to choose from.
Trekki 6 is going to be a HSH pickup configuration. Right now, I have the two ‘H’s: black uncovered Seymour Duncans donated by Adam T. a couple of months ago. And that leaves the perennial question: what to put in the middle position?
In my experience the middle pickup is the one that seems…well, unremarkable in so many guitars I’ve played. In Strats it’s as if its main purpose was just to be reverse wound, reverse polarity in order to create 2 hum-bucking tones via the selector switch. But in those superstrat guitars, for example Ibanez RGs, what does it really do? And when or how does anyone really ever use the ‘S’ in ‘HSH’?
Without tons of anecdotal research it’s difficult to know the answer to that question. As far as I can tell based on the various 3-pickup guitars I’ve owned or played the middle single coil is…kind of ‘middling’. If it’s a single coil, it risks an output drop compared to its Humbucker brother and sister. And if it’s a humbucker-in-single coil’s clothing then there’s no output drop but there’s still a risk of it just being kind of ‘middling’ again.
Seymour Duncan has a useful (hard to find) chart of its pickup resistance measurements that can help me find a SD middle single coil to match the two humbuckers I’ve got. Because I don’t know what models they are I’m going to have to take a reading on the meter and go from there.
Even when I’ve chosen matching or ‘balanced’ pickups based on their output levels I’m likely to be mixing single coils with humbuckers – so I’ll end up compromising on the pot value. Typically humbuckers are used with 500k pots and single coils with 250k ones and there’s plenty of online discussion about which values to use in a HSH situation (and what the consequences are for the tone).
So with all that in mind, here’s the logic that I think I’ll use to decide what pickup to put in the middle position:
1) Start with a balance of output that suits what you’ve already got. Do you want a volume drop when in the middle position? If no, then a higher output single coil is likely to be the best choice. If yes, then a wider range of lower output single coils area avaiable.
2) Choose something that sounds as different as possible. Here you’re pretty much working on written or spoken opinions online. You’re listening out for people talking about a pickup that sounds SO different that it jumps out at you.
3) If you can’t find one that sounds distinctive then at least choose one that LOOKS distinctive – like the Duesenberg single coil at the top of this page for example. There are rails, pole-less pickups, staple-style poles… large poles, regular poles, chrome covers, white, cream, black or flourescent cover colours… and many more besides.
Of course, if you don’t have any budget then the decision is a lot simpler: you’ll end up putting in whatever you have in your spares box – and hoping that it sounds at least interesting 😀
Right, where’s my multimeter? Time to measure the resistance of those two humbuckers…
Yep. 6 years ago I started doing guitar set ups – mainly because of a problem with a Taylor Baby acoustic that just wouldn’t play right. That story is recounted in the video below. The fun outcome was that I learned a few things I could put into practice on cheap, unloved guitars that transformed them… and Reloved Guitars was born.
For the first year or so I was doing guitar set ups alongside working 4 days a week in corporate business in London, doing the Plymouth to London and back every week on the train. Then in 2016 I stopped living the consultant life and found myself working on guitars all the time in the Reloved Guitars shed. For the next 4 years I worked away setting up guitars, posting YouTube videos and making the occasional custom build. By early 2020 things were going well; a pretty good reputation (without having to advertise apart from keeping a busy Facebook page and keeping YouTube stocked with real-time videos) and a growing number of custom build enquiries. But two things happened around that time: first, it became obvious that I’d outgrown the shed and second, COVID-19.
I’d been looking around for alternative workshop space for a year or so because it wasn’t fair on the neighbourhood to be running routers and erecting spray tents in the garden much longer… but finding somewhere affordable and nearby was difficult. On top of that, COVID-19 made it difficult to plan both in terms of a sudden dip in business in spring / summer 2020 and also getting out to make enquiries.
But I didn’t give up. As a stepping-stone a friend and nearby neighbour with a professional joinery workshop built underneath his house kindly let me bring my routing / bandsawing work and do it in bursts down there. Eventually, through a friend of his, I found an available workshop space on an industrial estate 5 minutes from home. Not only was it close but I was offered it at an amazingly low price which took away the financial risk of making such a move. The site owner and I shook hands and Reloved Guitars’ move was set in motion.
So from November 1st I’ll be transplanting Reloved Guitars slowly across into the new space. Being on an industrial estate means there are almost no processes I can’t do (noise, chemicals etc) and literally no time of day I can’t do them. Those two things alone – plus about 3 to 4 times more space to do it in – open up the possibility to transform my productivity, quality and even creativity. And freedom to make as much noise – including guitar noise! – as I like.
The space is currently a dusty old site office on the 1st floor that looks like the set of a Carry On film that was shot in the 1970s and then forgotten. But that’s superficial: with a good clean up, removal of unwanted fittings, a coat of paint and a couple of custom-built work benches it’ll be just perfect. I’ll document the progress here and on the Reloved Guitars Facebook page. This move coincides with getting this website up and running. I’ve had the shell of this WordPress site in the background for some time but hadn’t had a reason to add it to the mix until now. The move to a new workshop seems like a good enough reason to finish creating the content and make it live.